Connecting Resly to Staylonger
Last Updated: July 17, 2026
Table of Contents
Staylonger is Australia's platform for furnished mid-term rentals, with a minimum stay of 30 nights. This guide walks you through connecting your Resly account to Staylonger, importing your properties, mapping your rooms and rates, and setting long-stay discounts.
The whole process takes around 20–30 minutes. Rates, availability, property descriptions and photos all sync automatically from Resly once you're connected.
Before you start
You'll need:
- Your Resly login (with access to Resly Express / channel management).
- An email address for your Staylonger host account. Use one Staylonger account per Resly connection — if you run multiple Resly accounts, create a separate Staylonger login for each.
Part 1 — Add the Staylonger channel in Resly
- Log in to Resly and open Resly Express. On the Channels tab you'll see Staylonger alongside your other channels (Airbnb, Booking.com, VRBO).
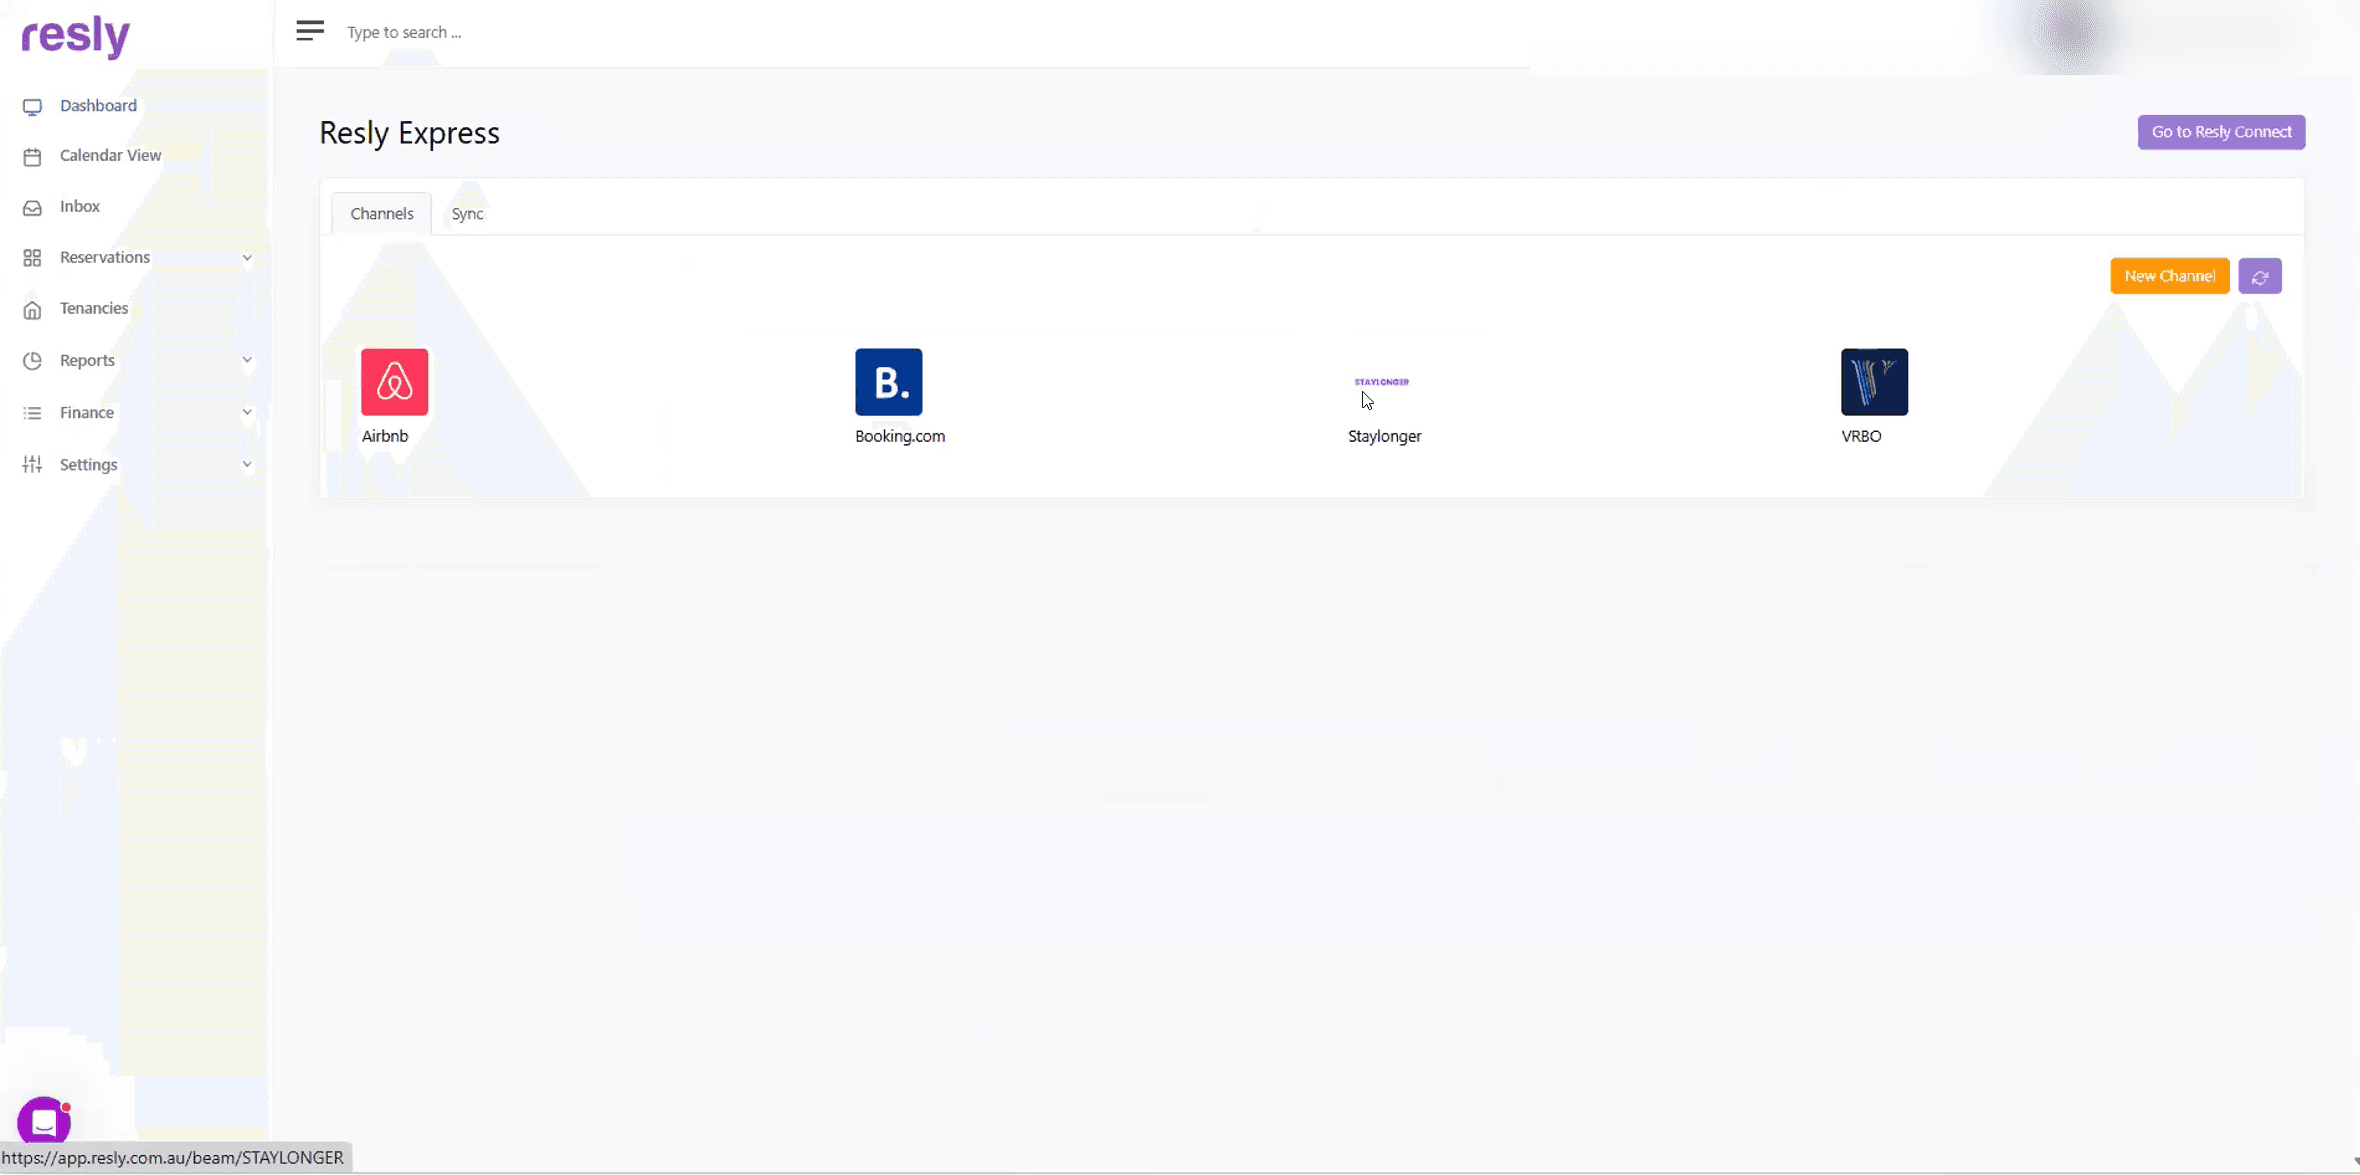
Resly Express → Channels — Staylonger appears as a channel tile. - Click the Staylonger tile to open the channel page, then click Add Account. Take note of your channel account code — you'll enter it on the Staylonger side in Part 3.
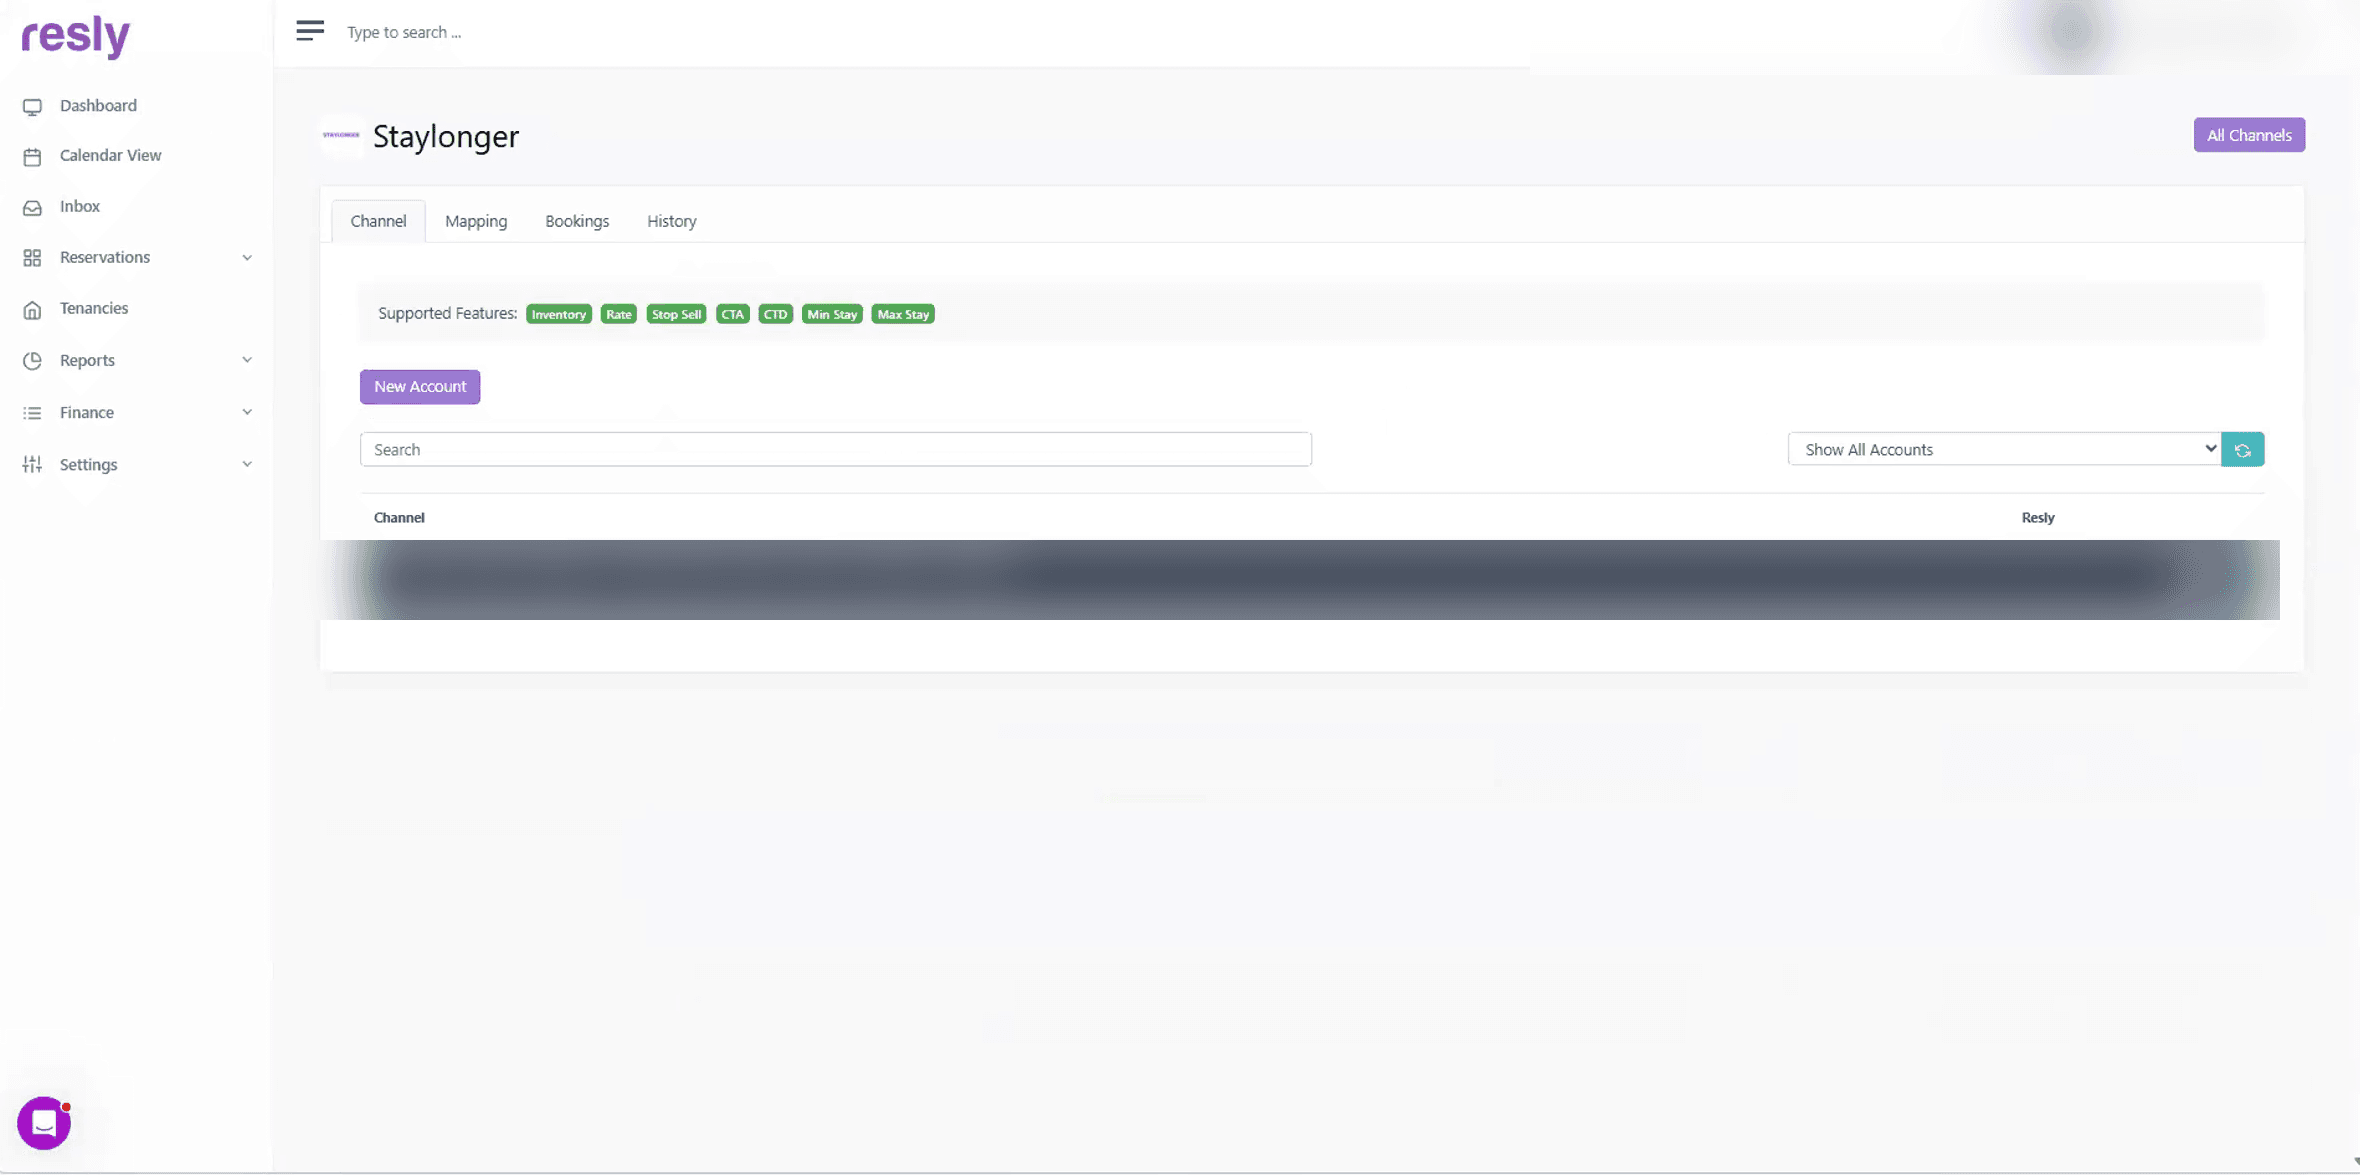
The Staylonger channel page in Resly.
Part 2 — Create your Staylonger host account
Go to staylonger.com.au, click Log in, then Register as a partner host. Booking notifications will be sent to the email address you register with.
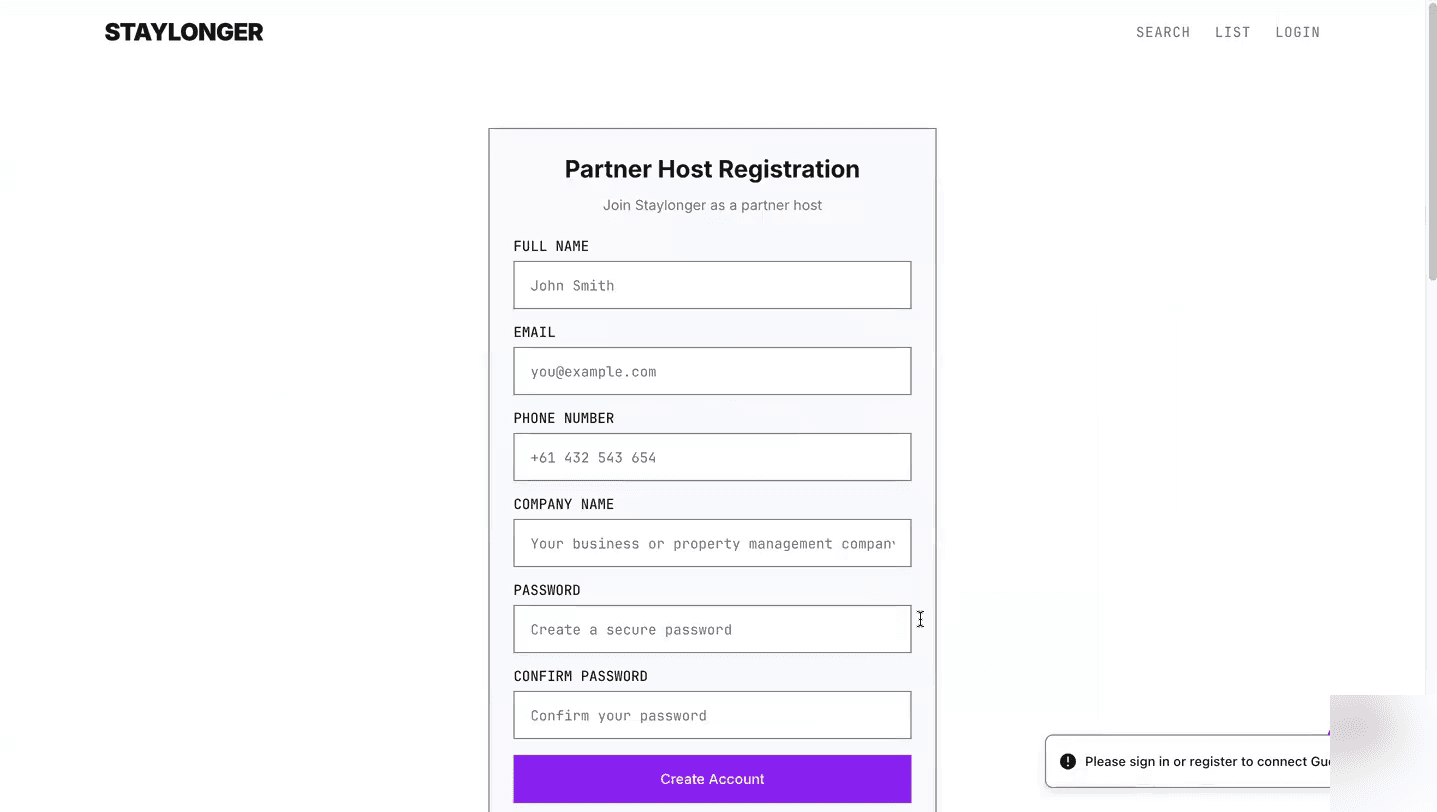
Part 3 — Connect Resly and import your properties
- Once signed in, click Add Your First Property and choose Resly.
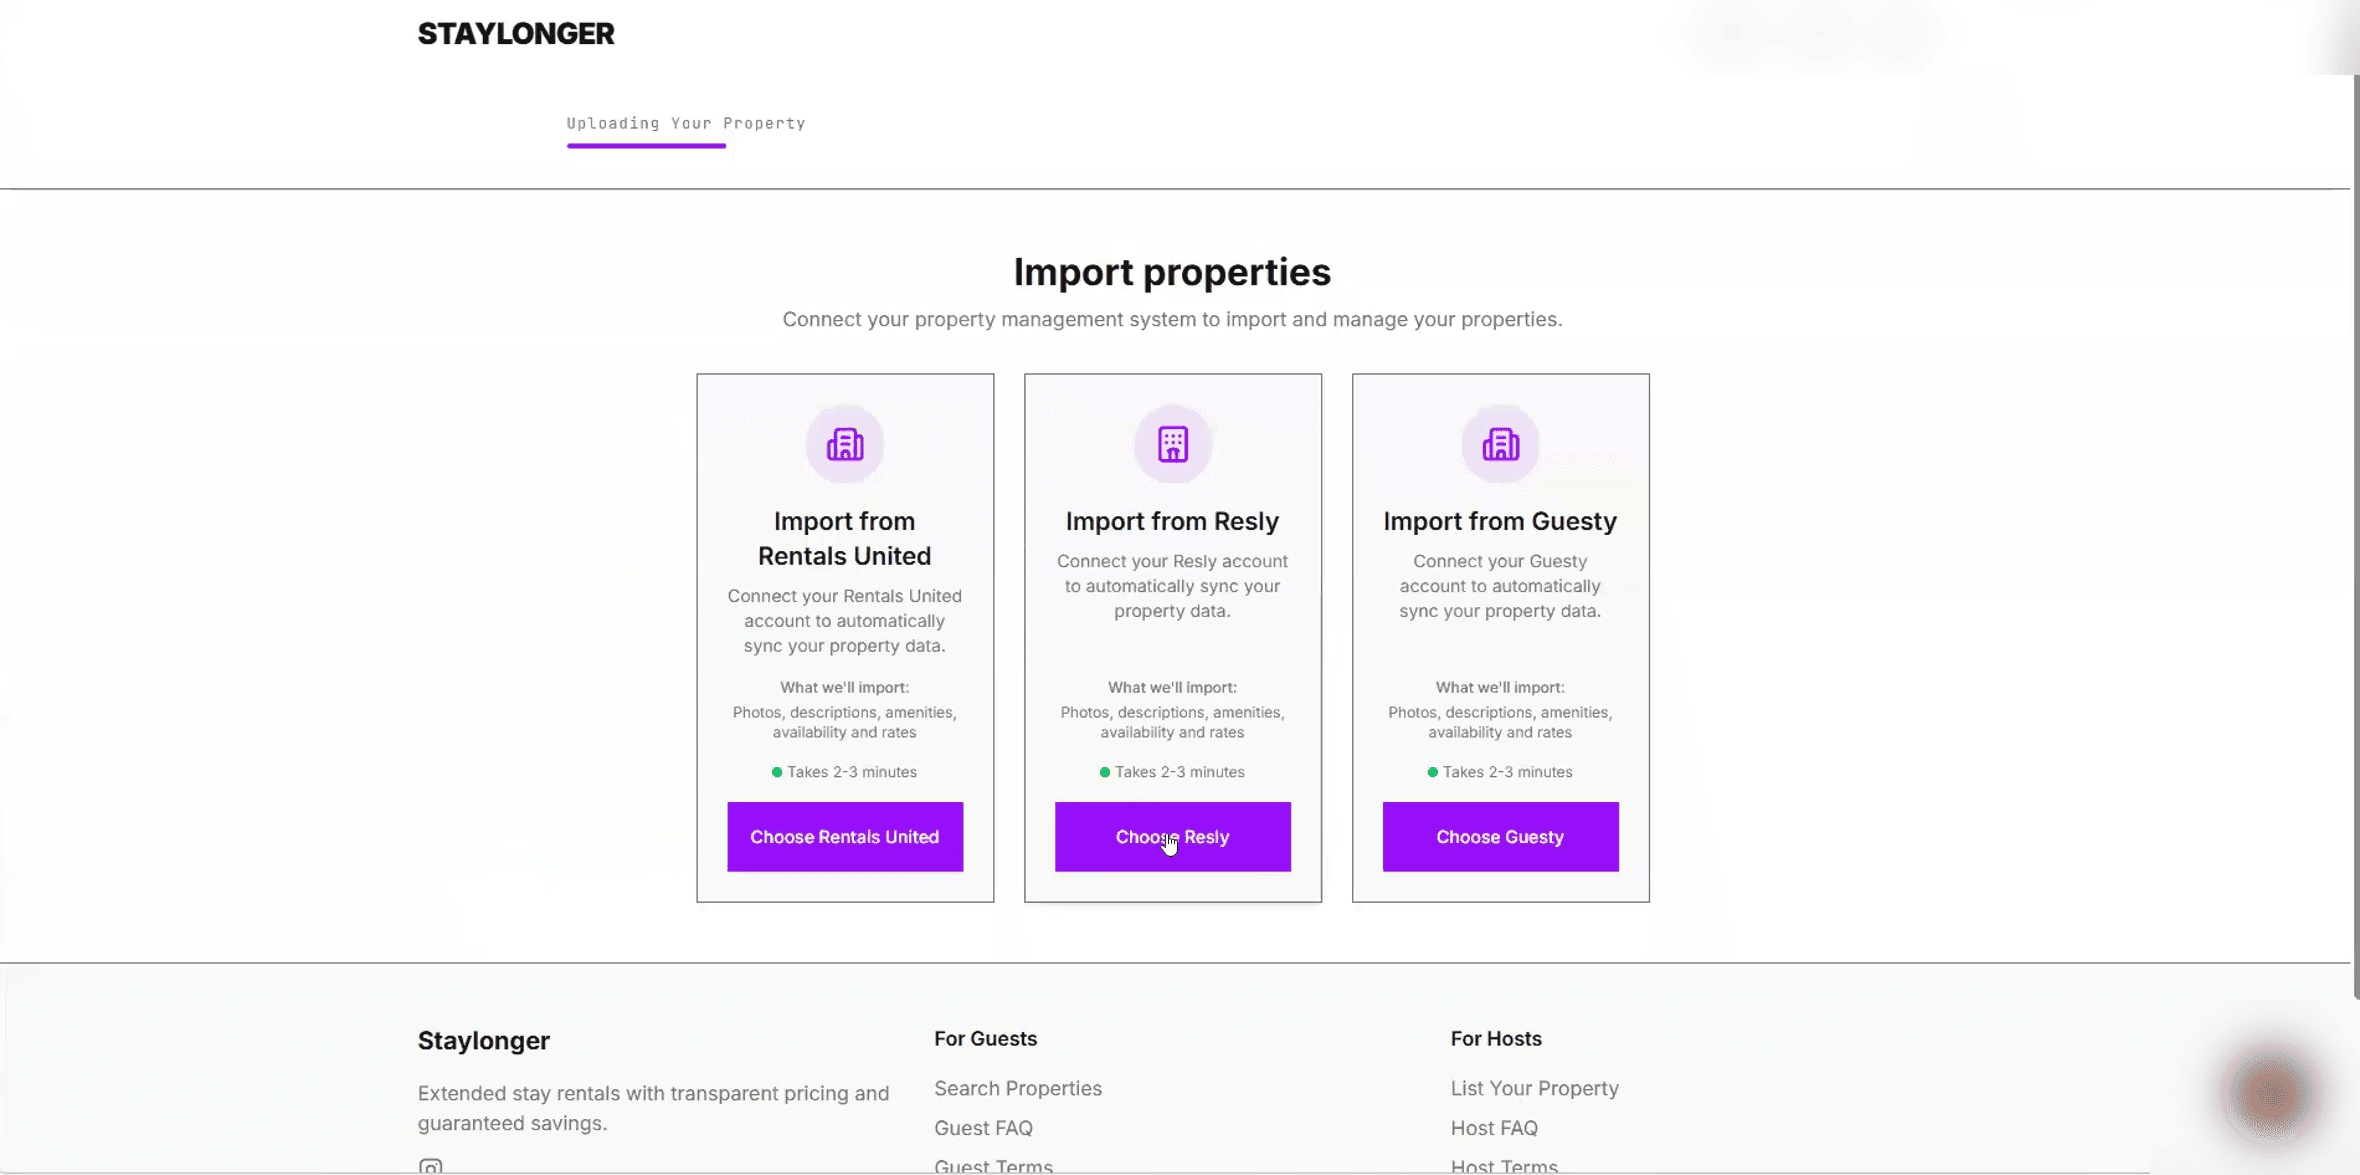
Choose Resly as your property management system. - Enter your Resly channel account ID in the Add Resly Integration window and confirm.
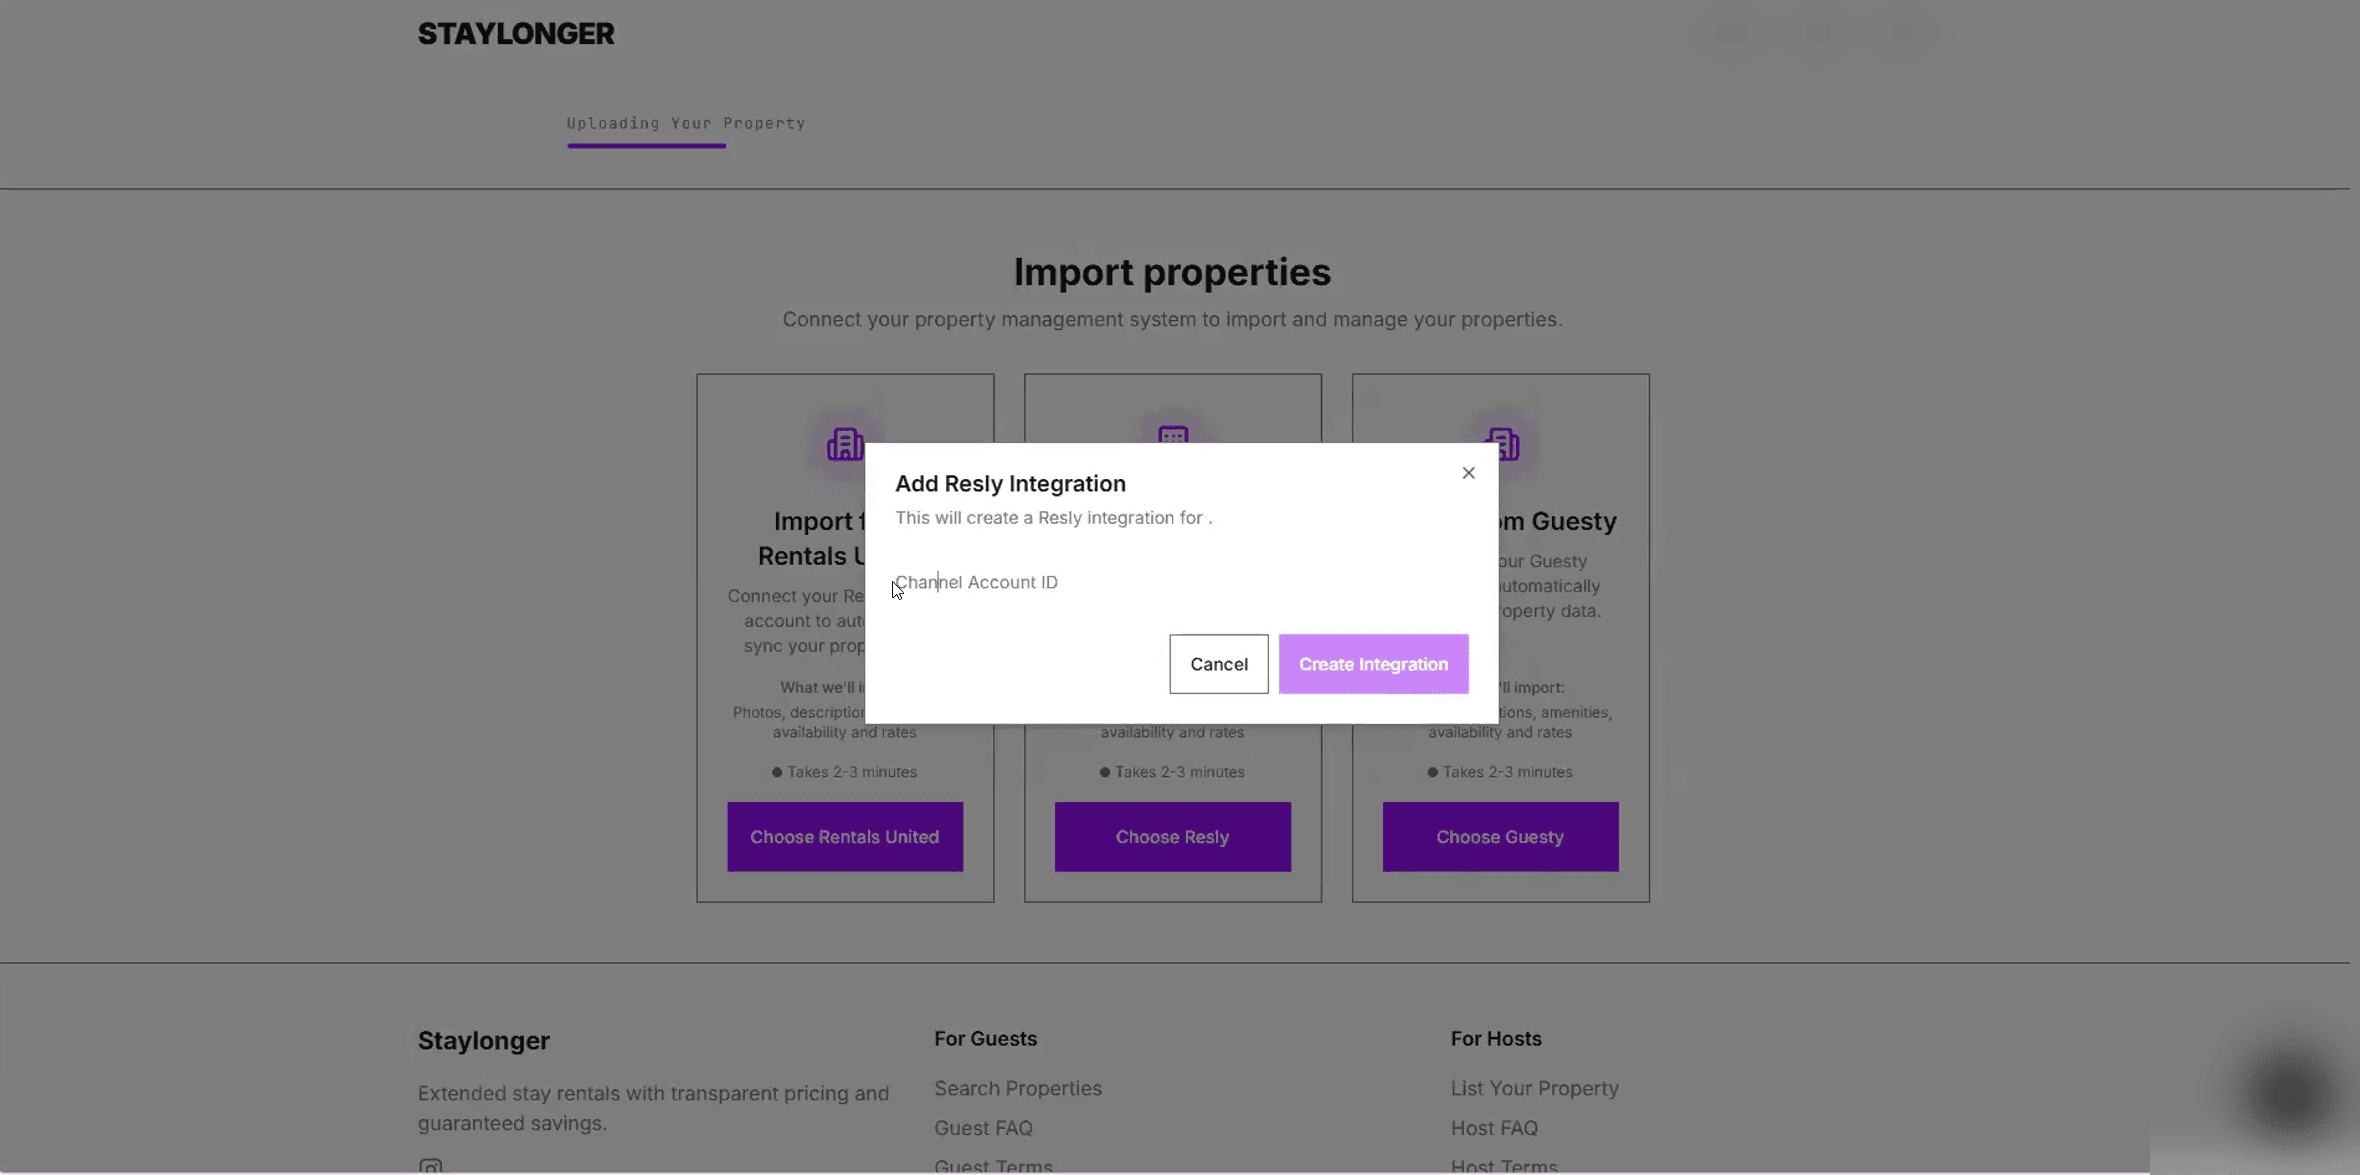
Add Resly Integration — enter your channel account ID. - Your Resly properties will appear in a list. Click Import next to each property you want on Staylonger (or Select All on This Page). A confirmation banner will remind you to head back to Resly to map your rates.
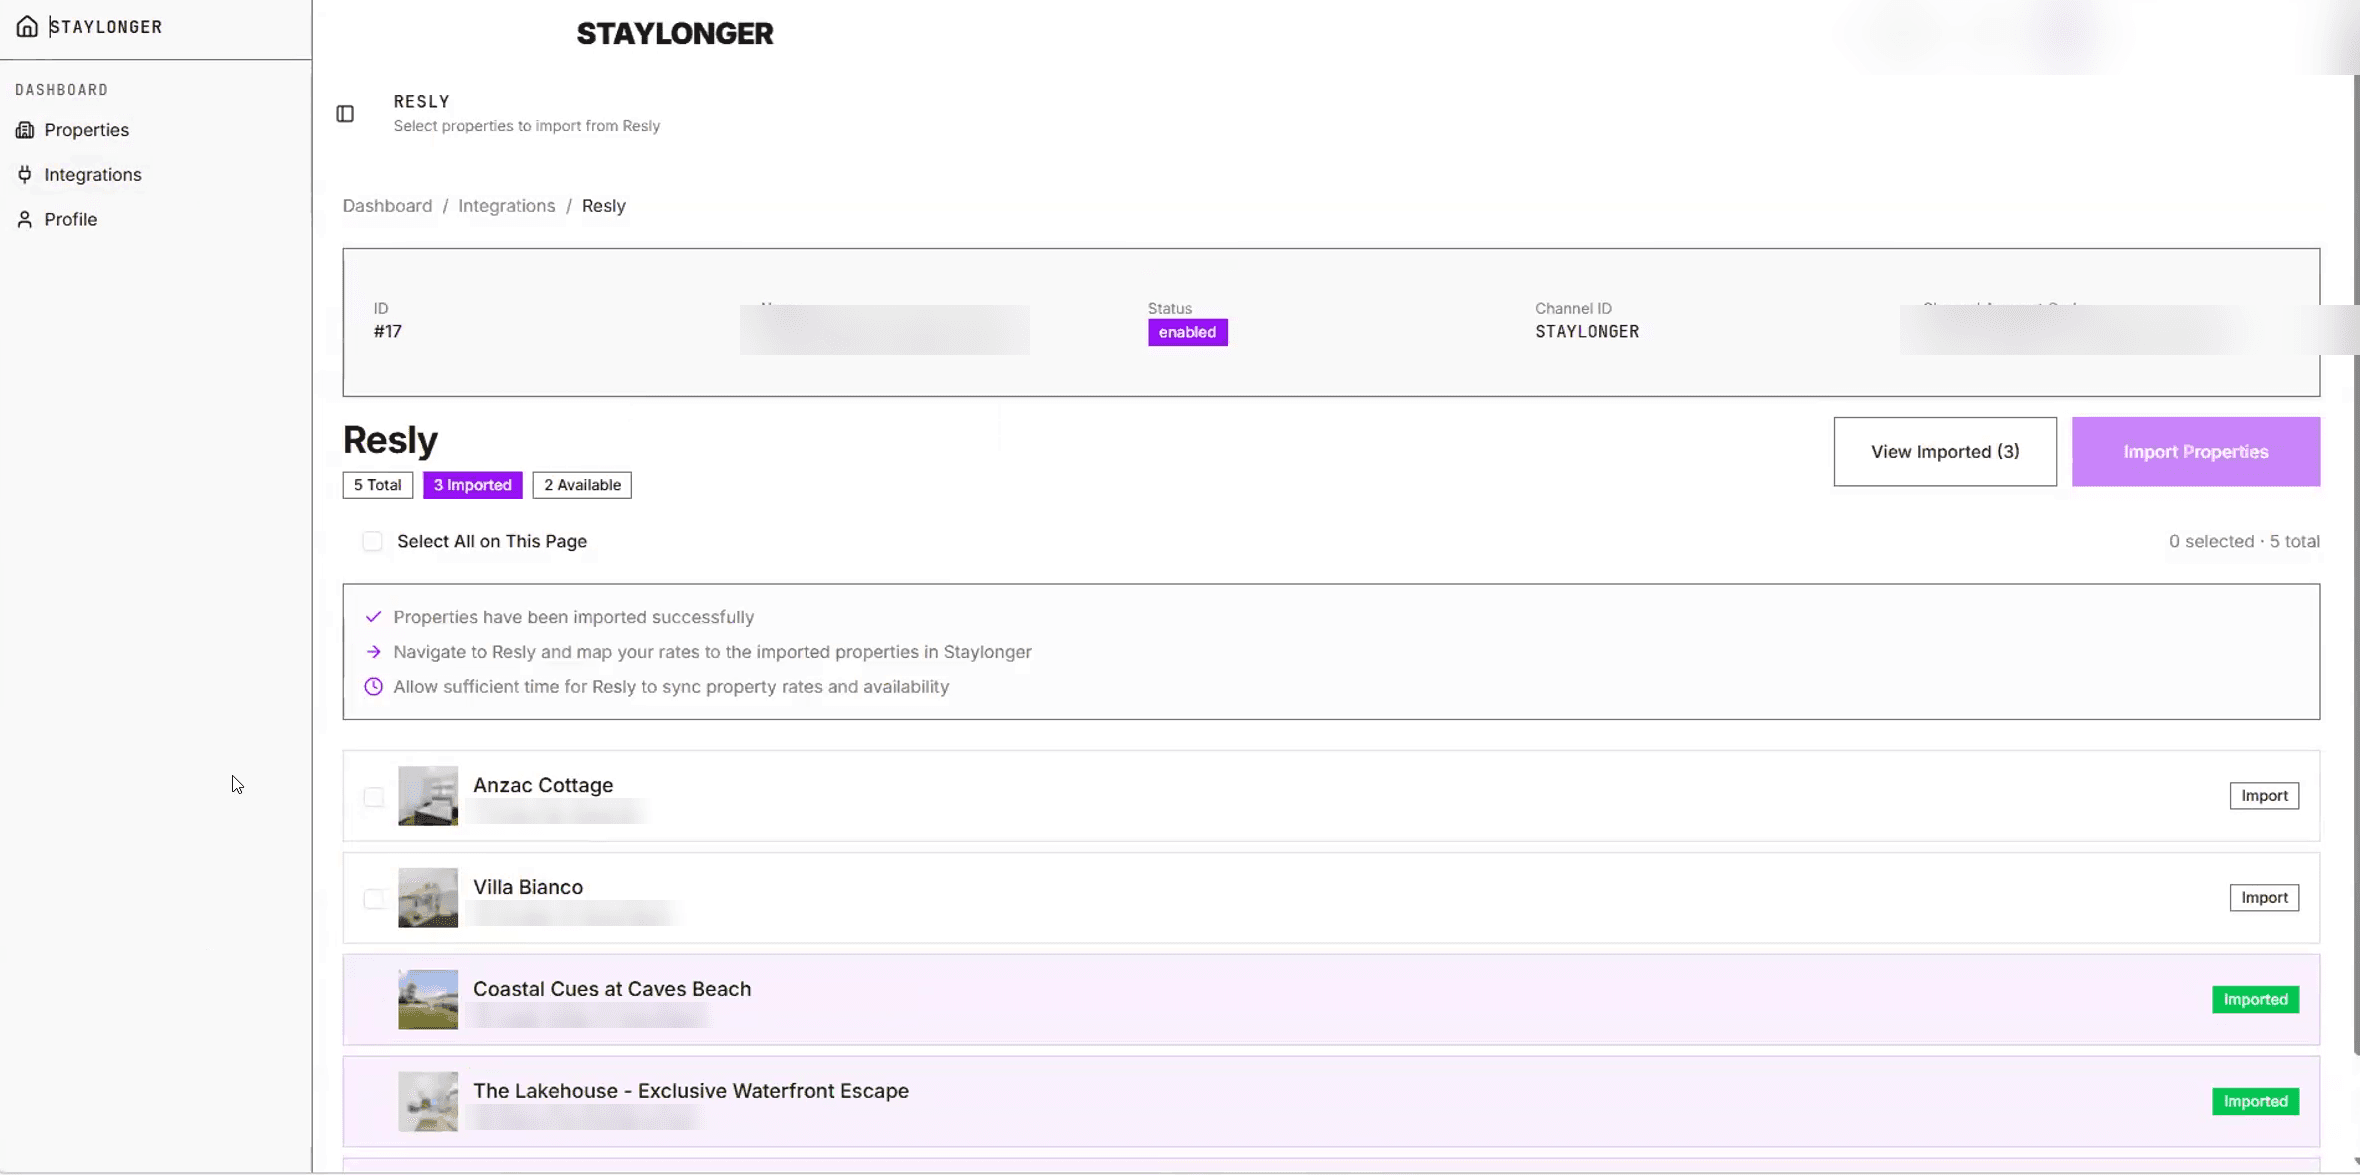
Import your properties, then return to Resly to complete mapping.
Part 4 — Map room types and rate plans in Resly
Staylonger receives rates and availability through the room and rate mapping you set in Resly — the same process you use for your other channels.
- Back in Resly, open the Staylonger channel page. Your connected properties are listed with their room types and rate plans.
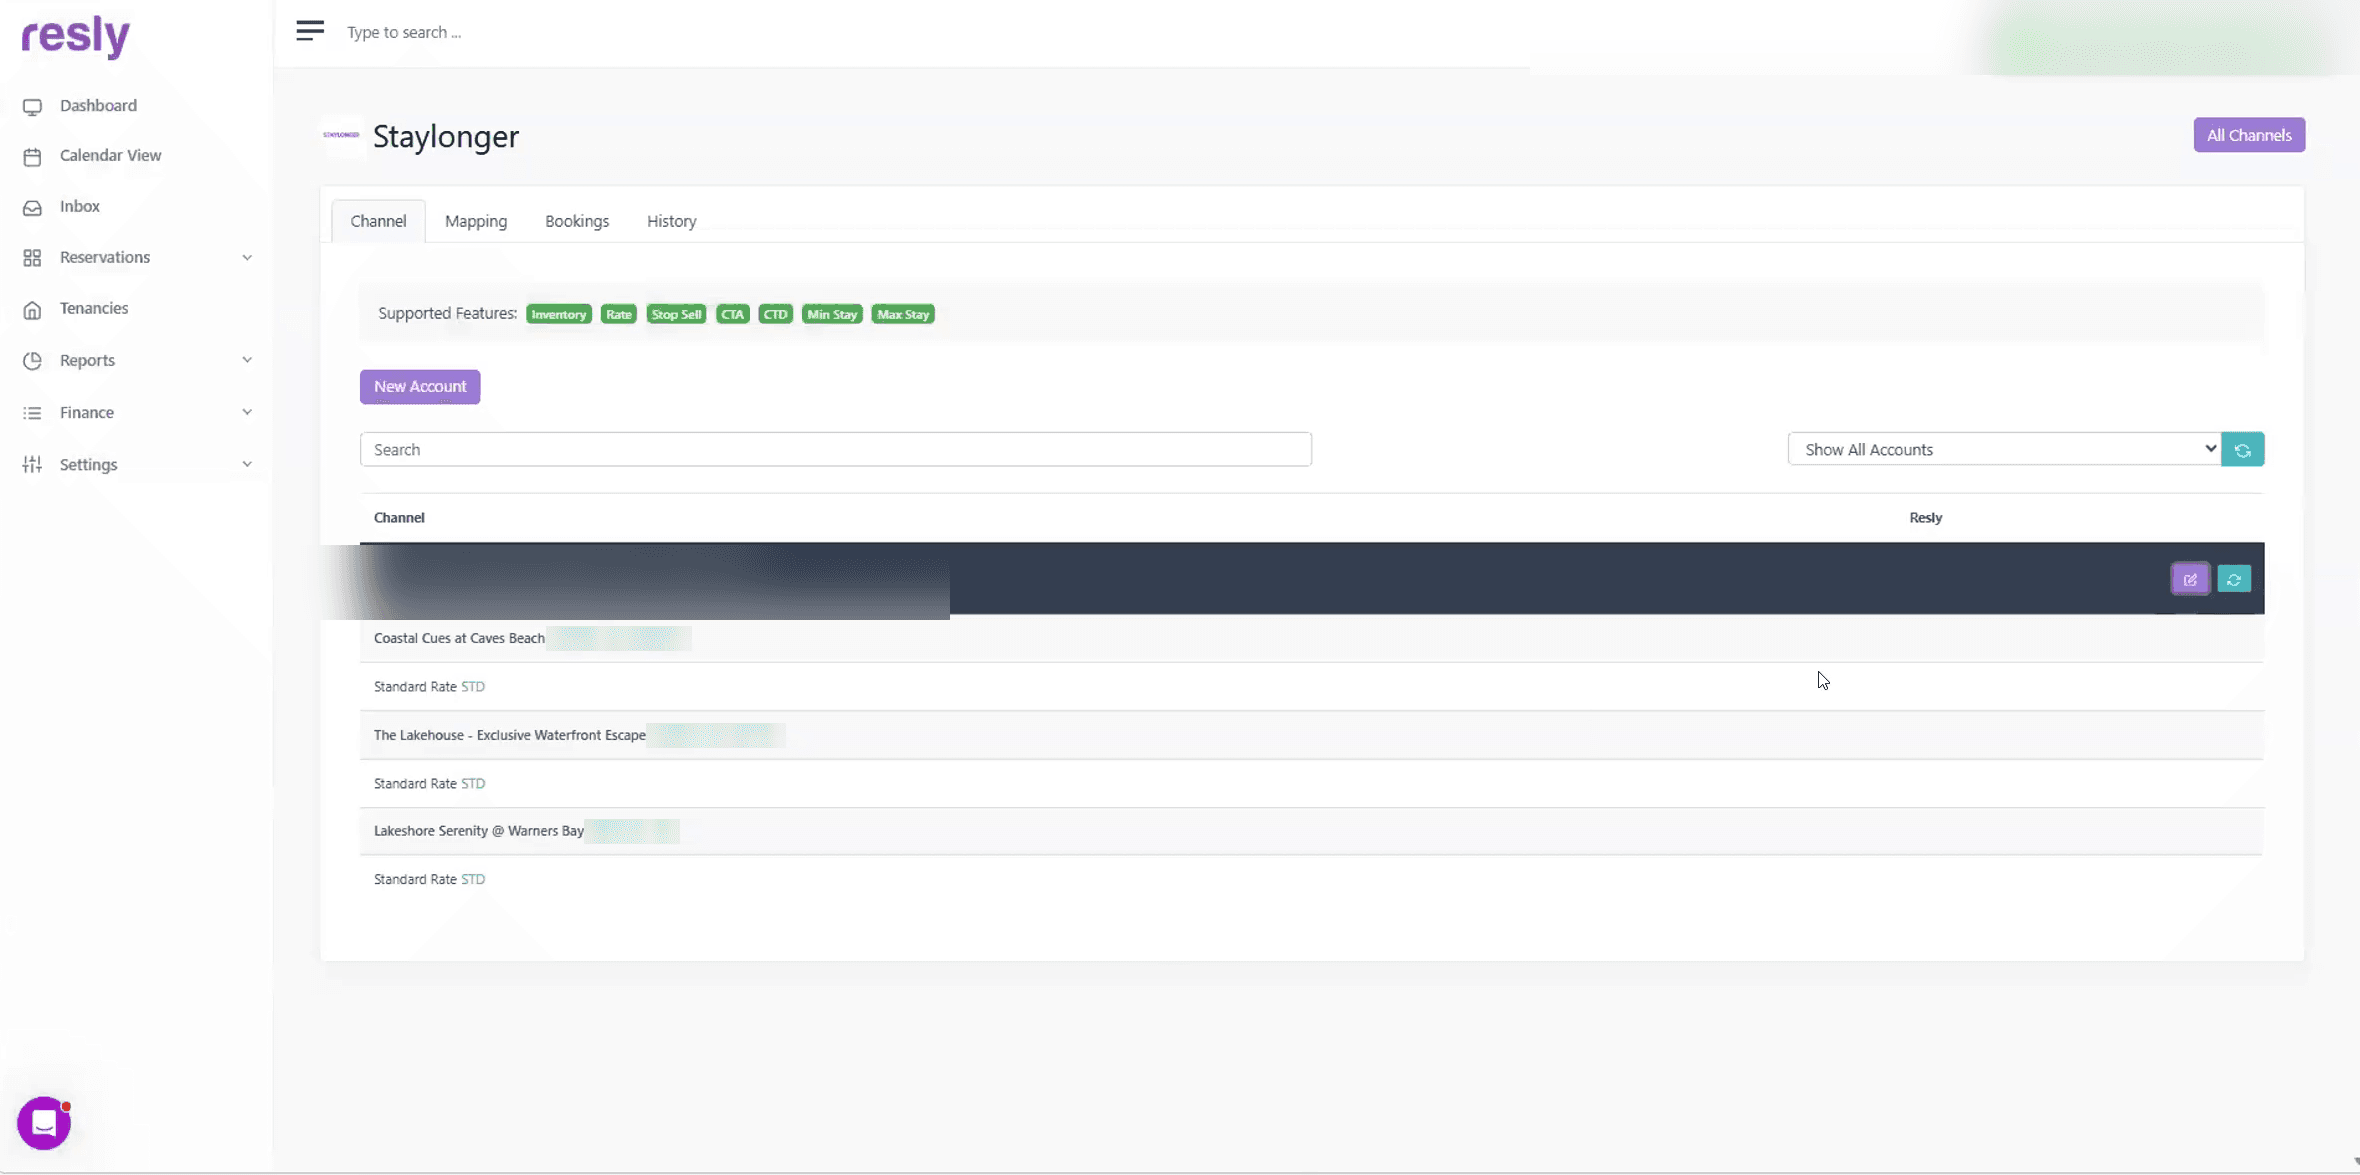
The Staylonger channel in Resly after the account is added. - Map each room type and rate plan to the matching Staylonger property.
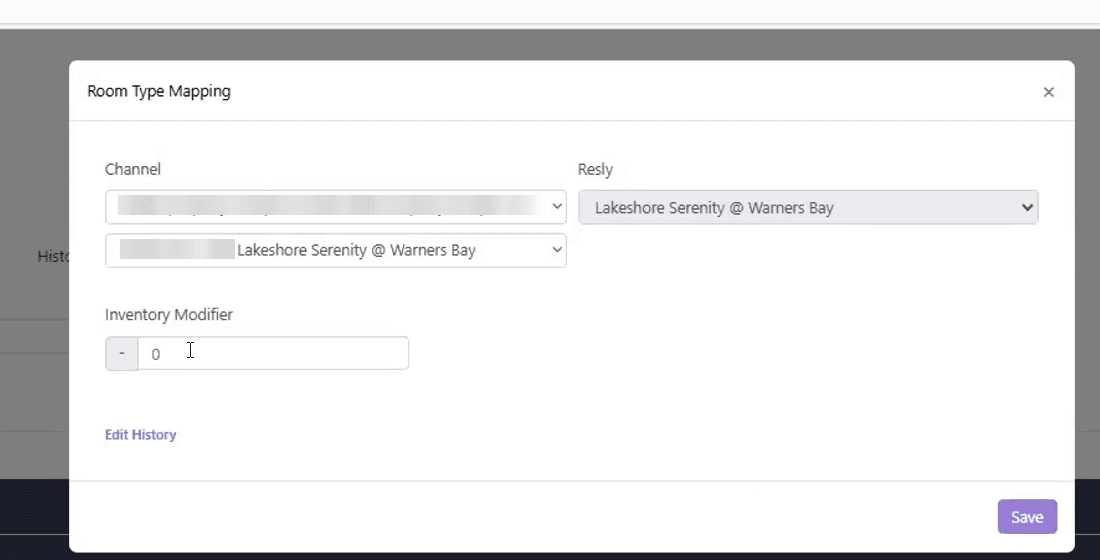
Room Type Mapping in Resly. - Save your mapping, then click the re-sync button to push a full channel sync.
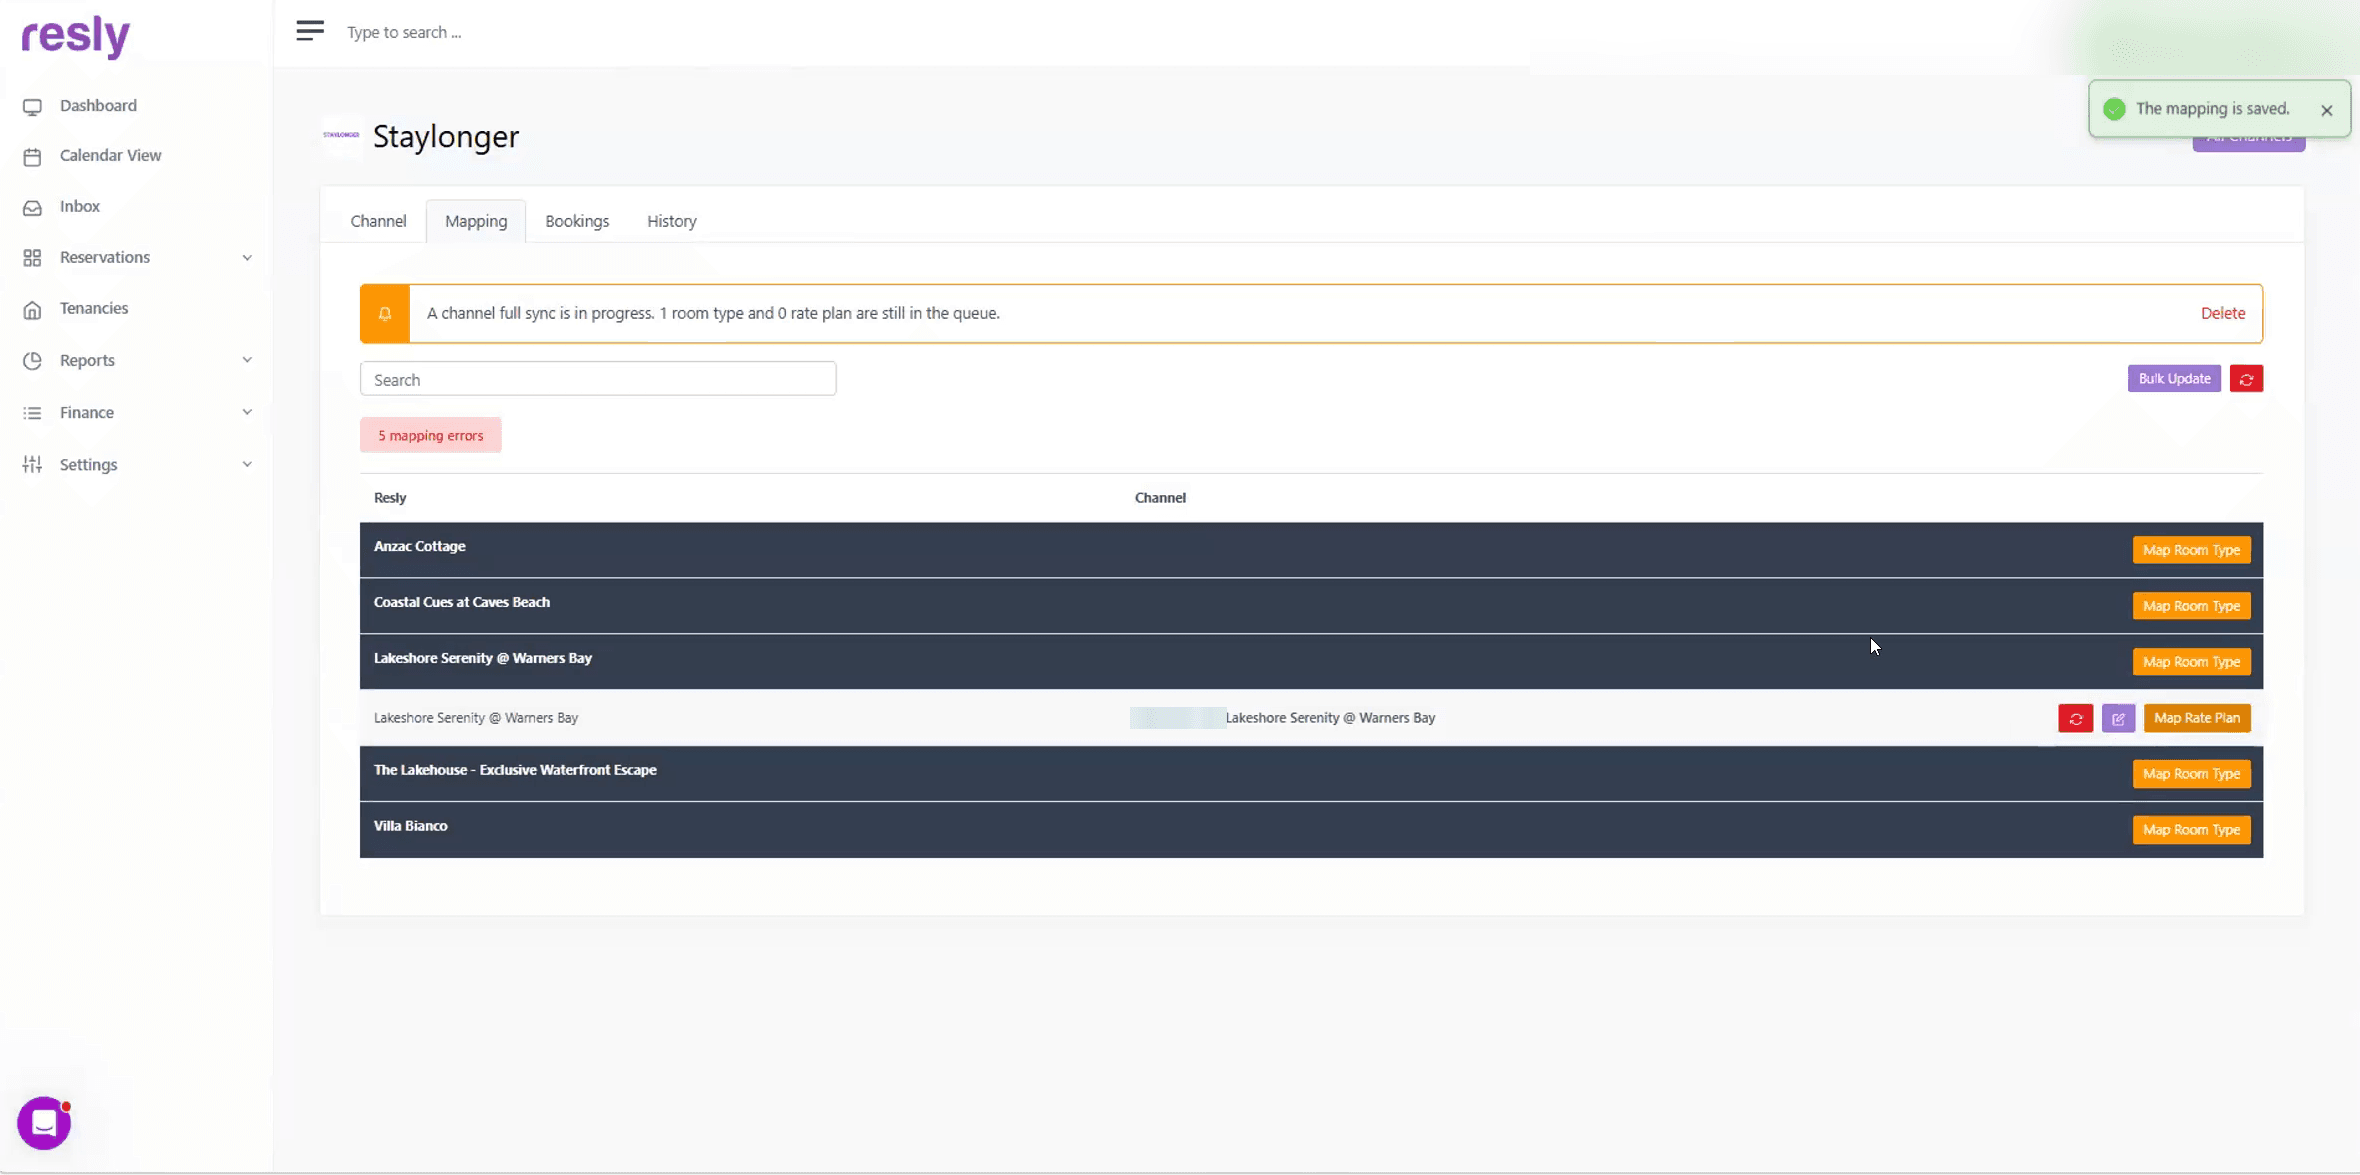
A full channel sync is queued after mapping — allow a few minutes.
Note: Syncing takes a few minutes. Resly pushes your rates, availability and property content to Staylonger, after which the calendar becomes visible on the Staylonger side.
Part 5 — Set your long-stay discounts
The nightly rate Staylonger receives from Resly does not include any long-stay discounts you may run elsewhere. Because most Staylonger bookings are 30 nights or more, you set discounts for longer stays directly on the Staylonger platform — they apply only to Staylonger and don't affect any other channel.
- In Staylonger, go to Properties, expand a property using the arrow on the left, and click View Calendar to confirm rates and availability have synced.
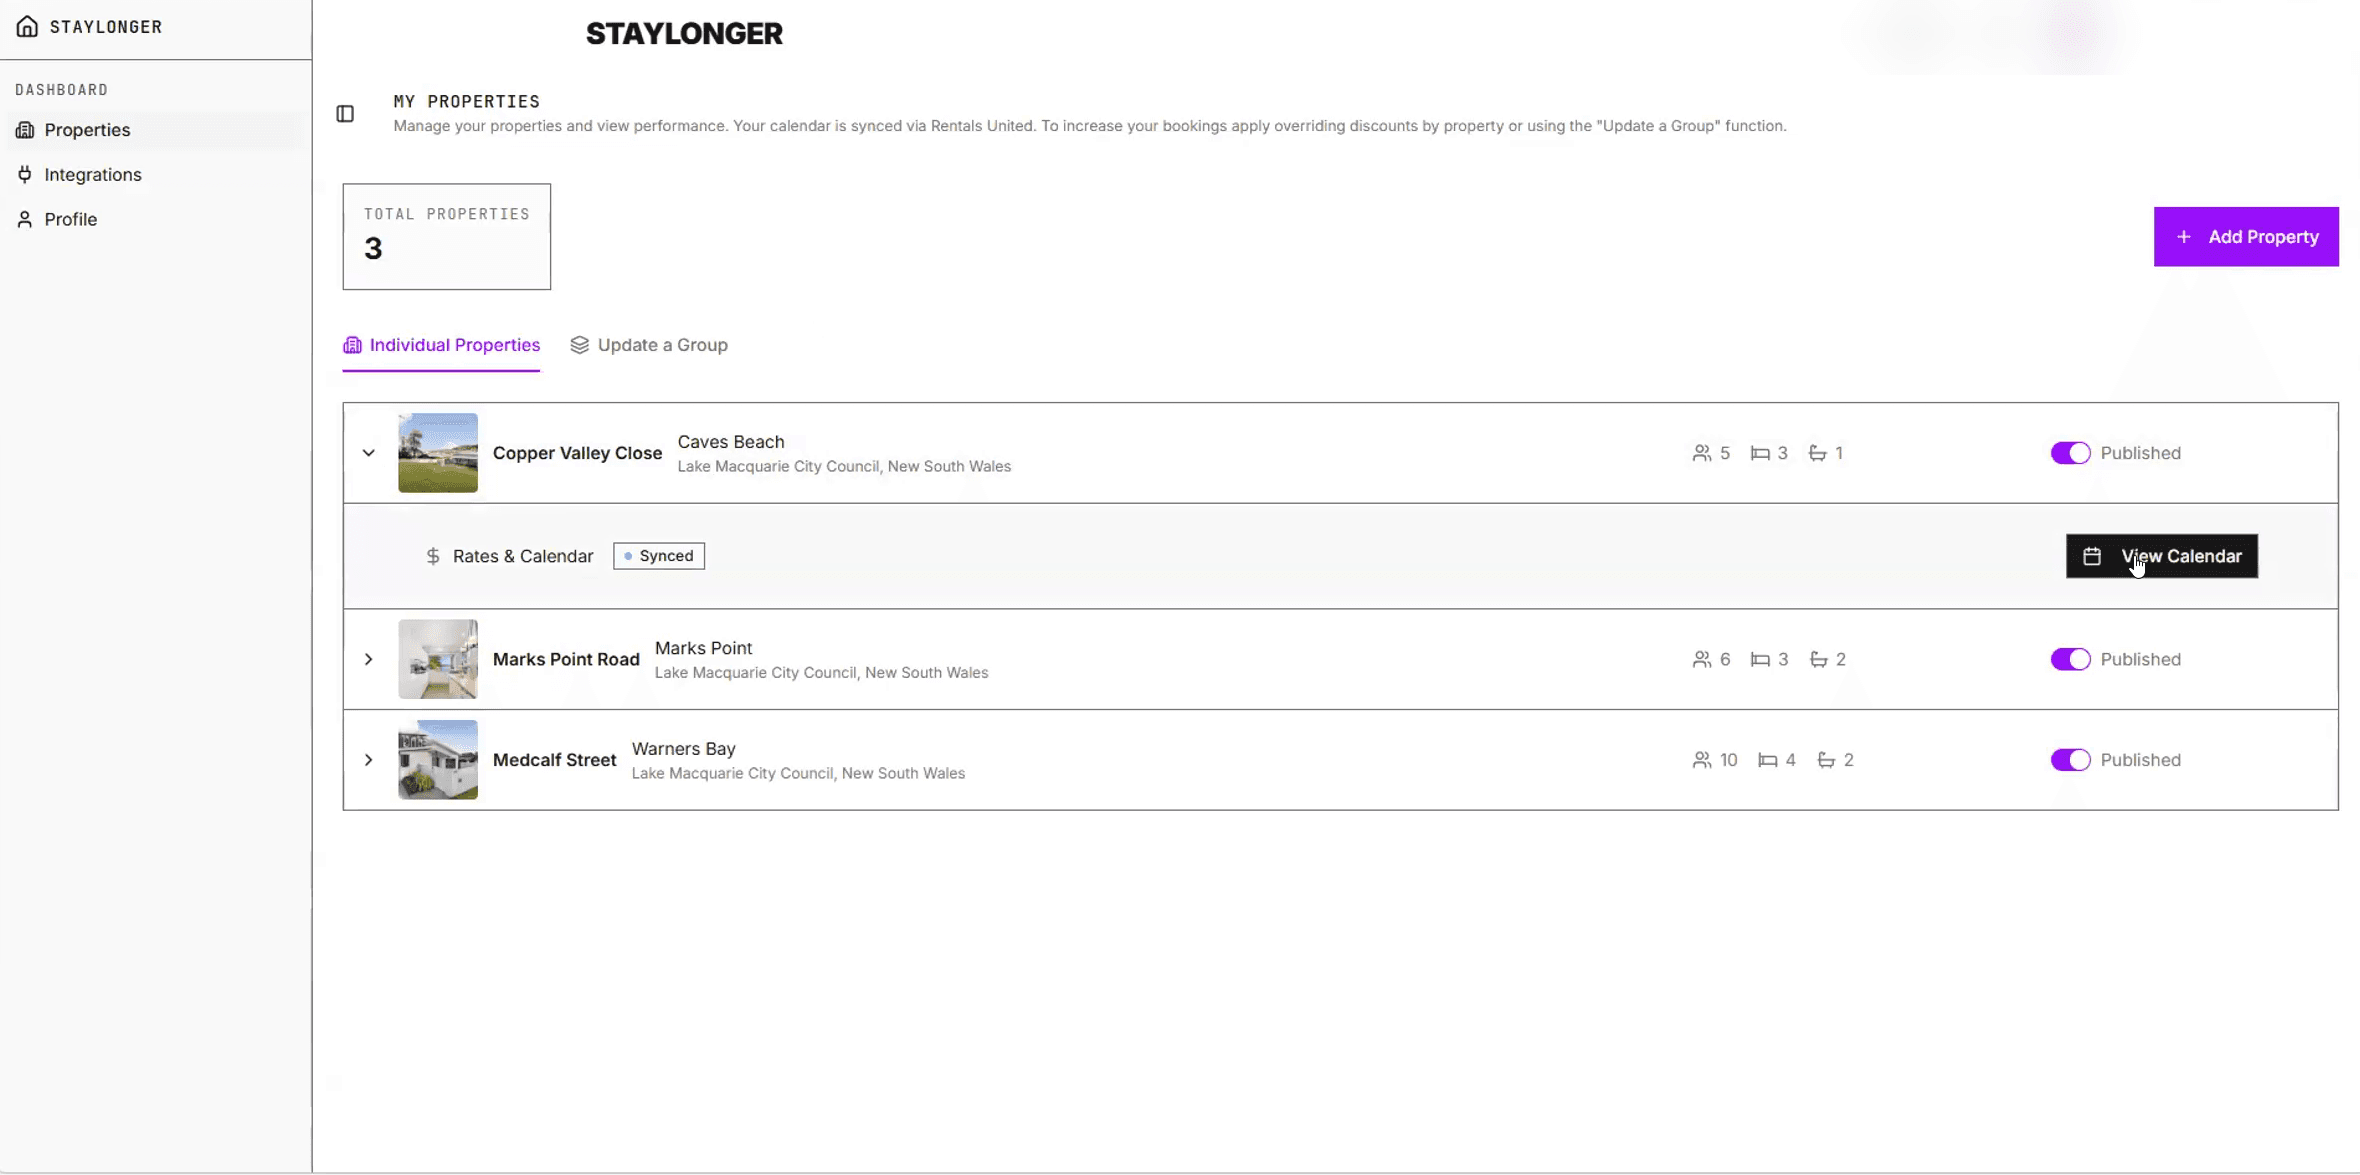
Expand a property and click View Calendar. - Nominate discount percentages for 30, 60, 90+ day stays and click Submit.
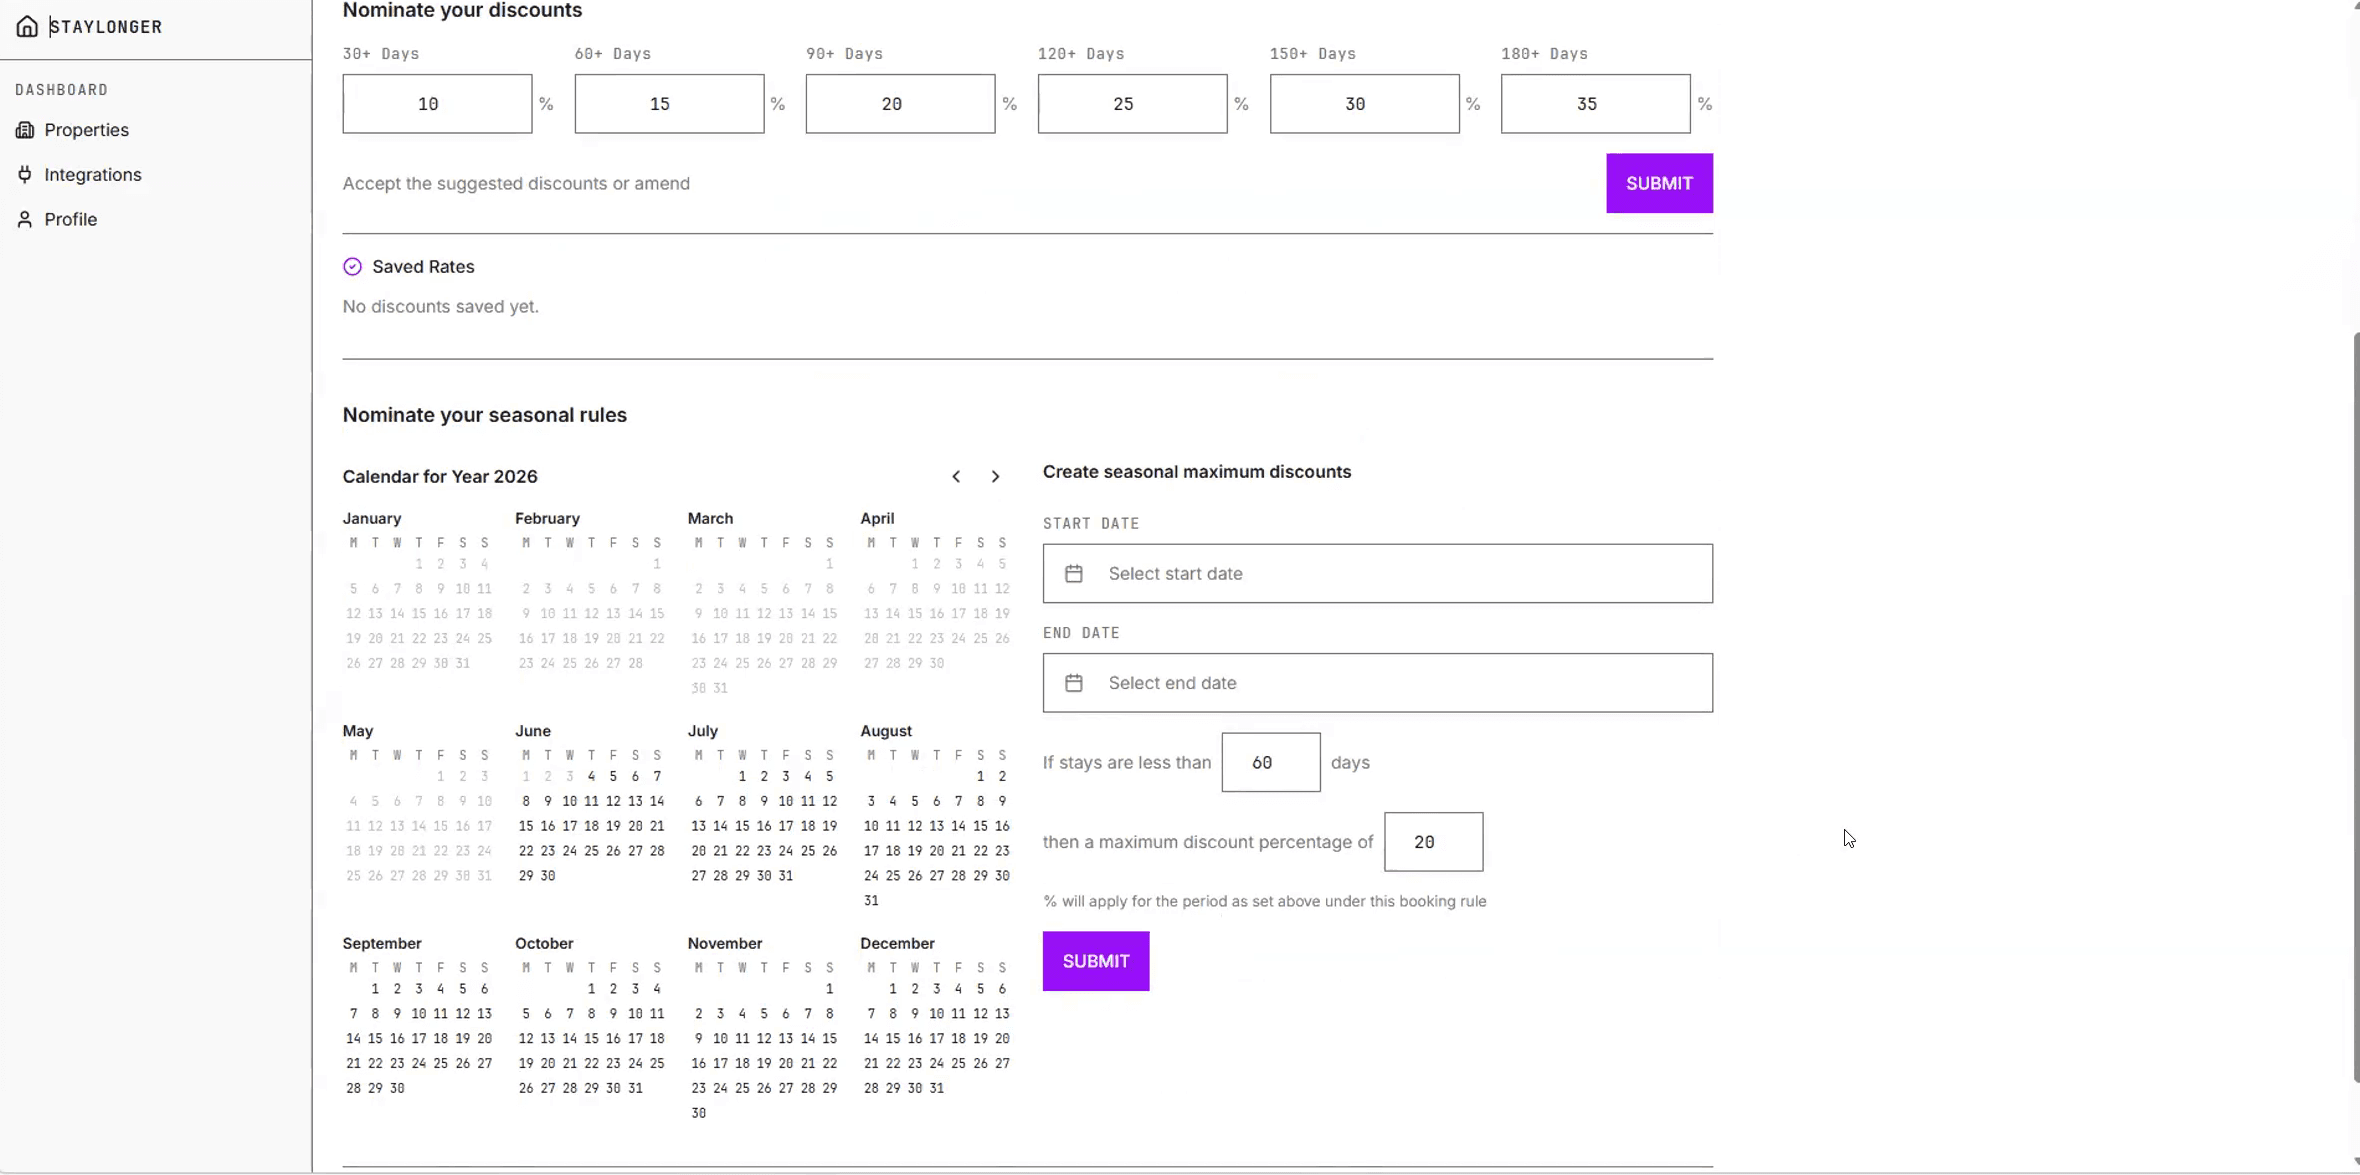
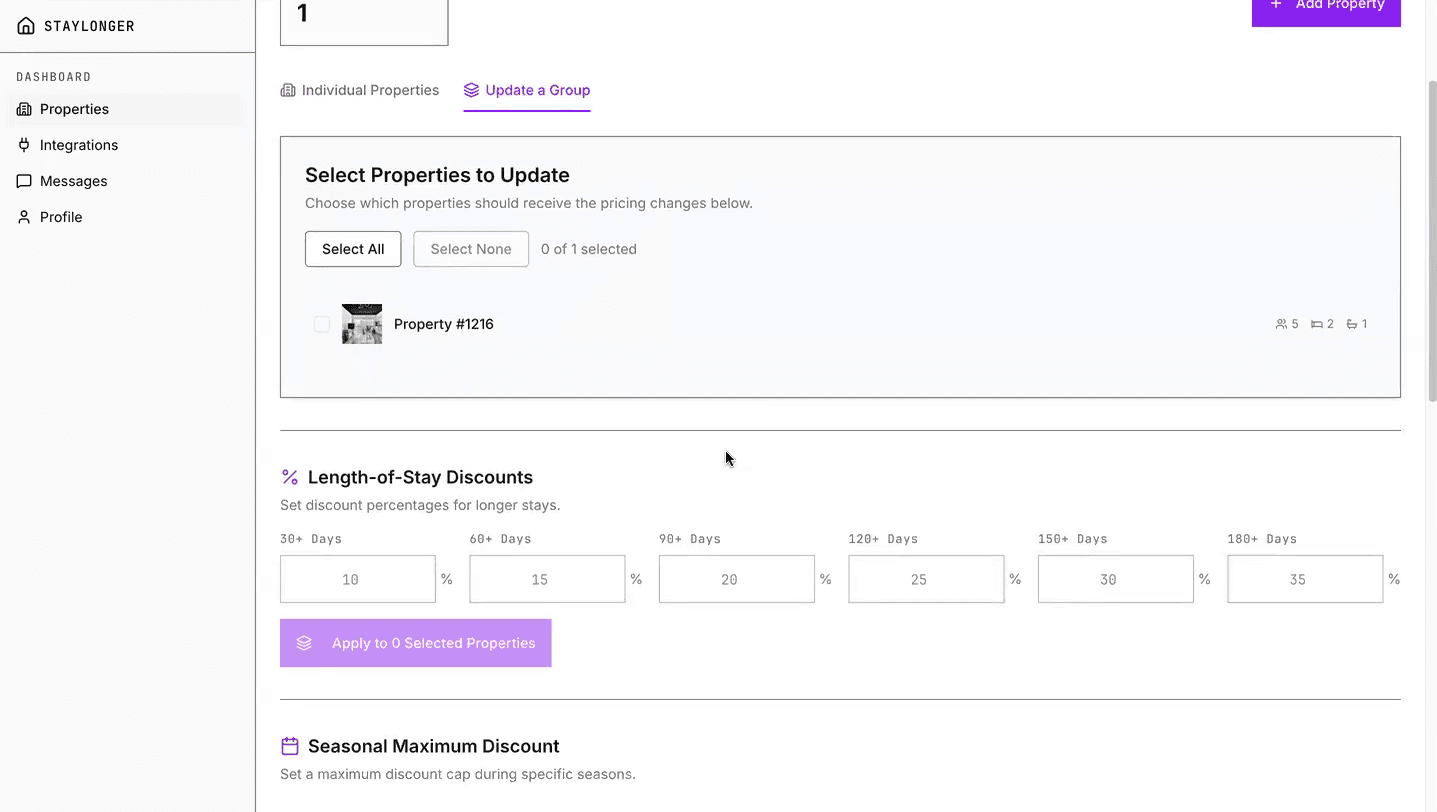
Nominate your discounts for longer stays. - Optionally add seasonal rules to cap discounts over peak periods — for example, a maximum discount of 5% over December–January. This beats blacking out dates: you stay bookable at close to full rate.
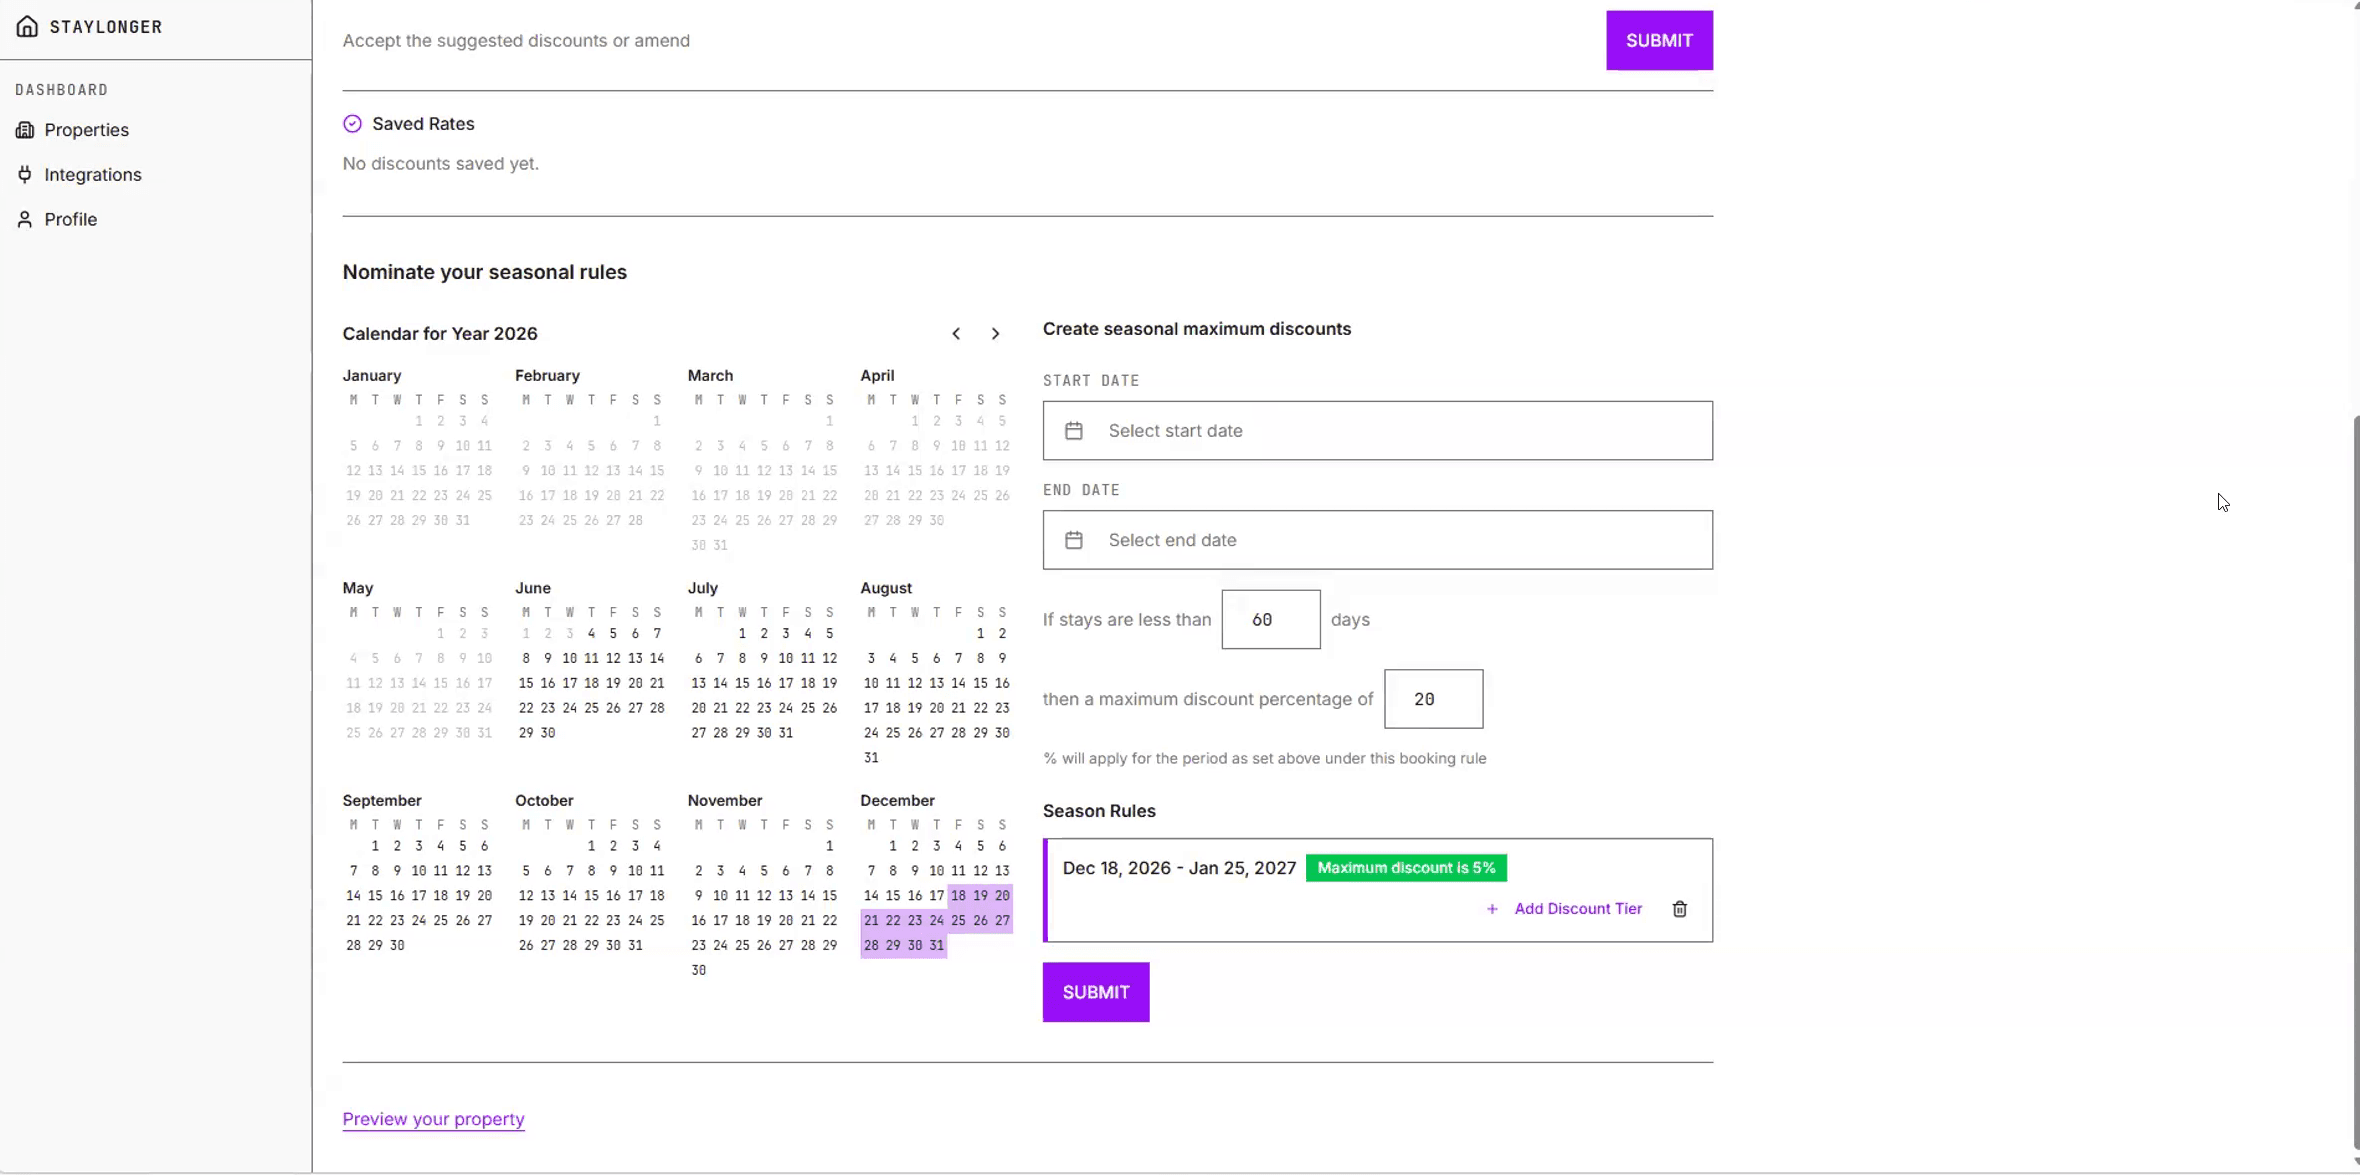
A seasonal rule capping the maximum discount over the peak period.
Tip: To apply the same discounts across many properties at once, use the Update a Group tab on the Properties page.
Part 6 — Preview and publish
- From the discounts page, click Preview your property to see your live listing page — photos, description, bedrooms and rates all come through from Resly.
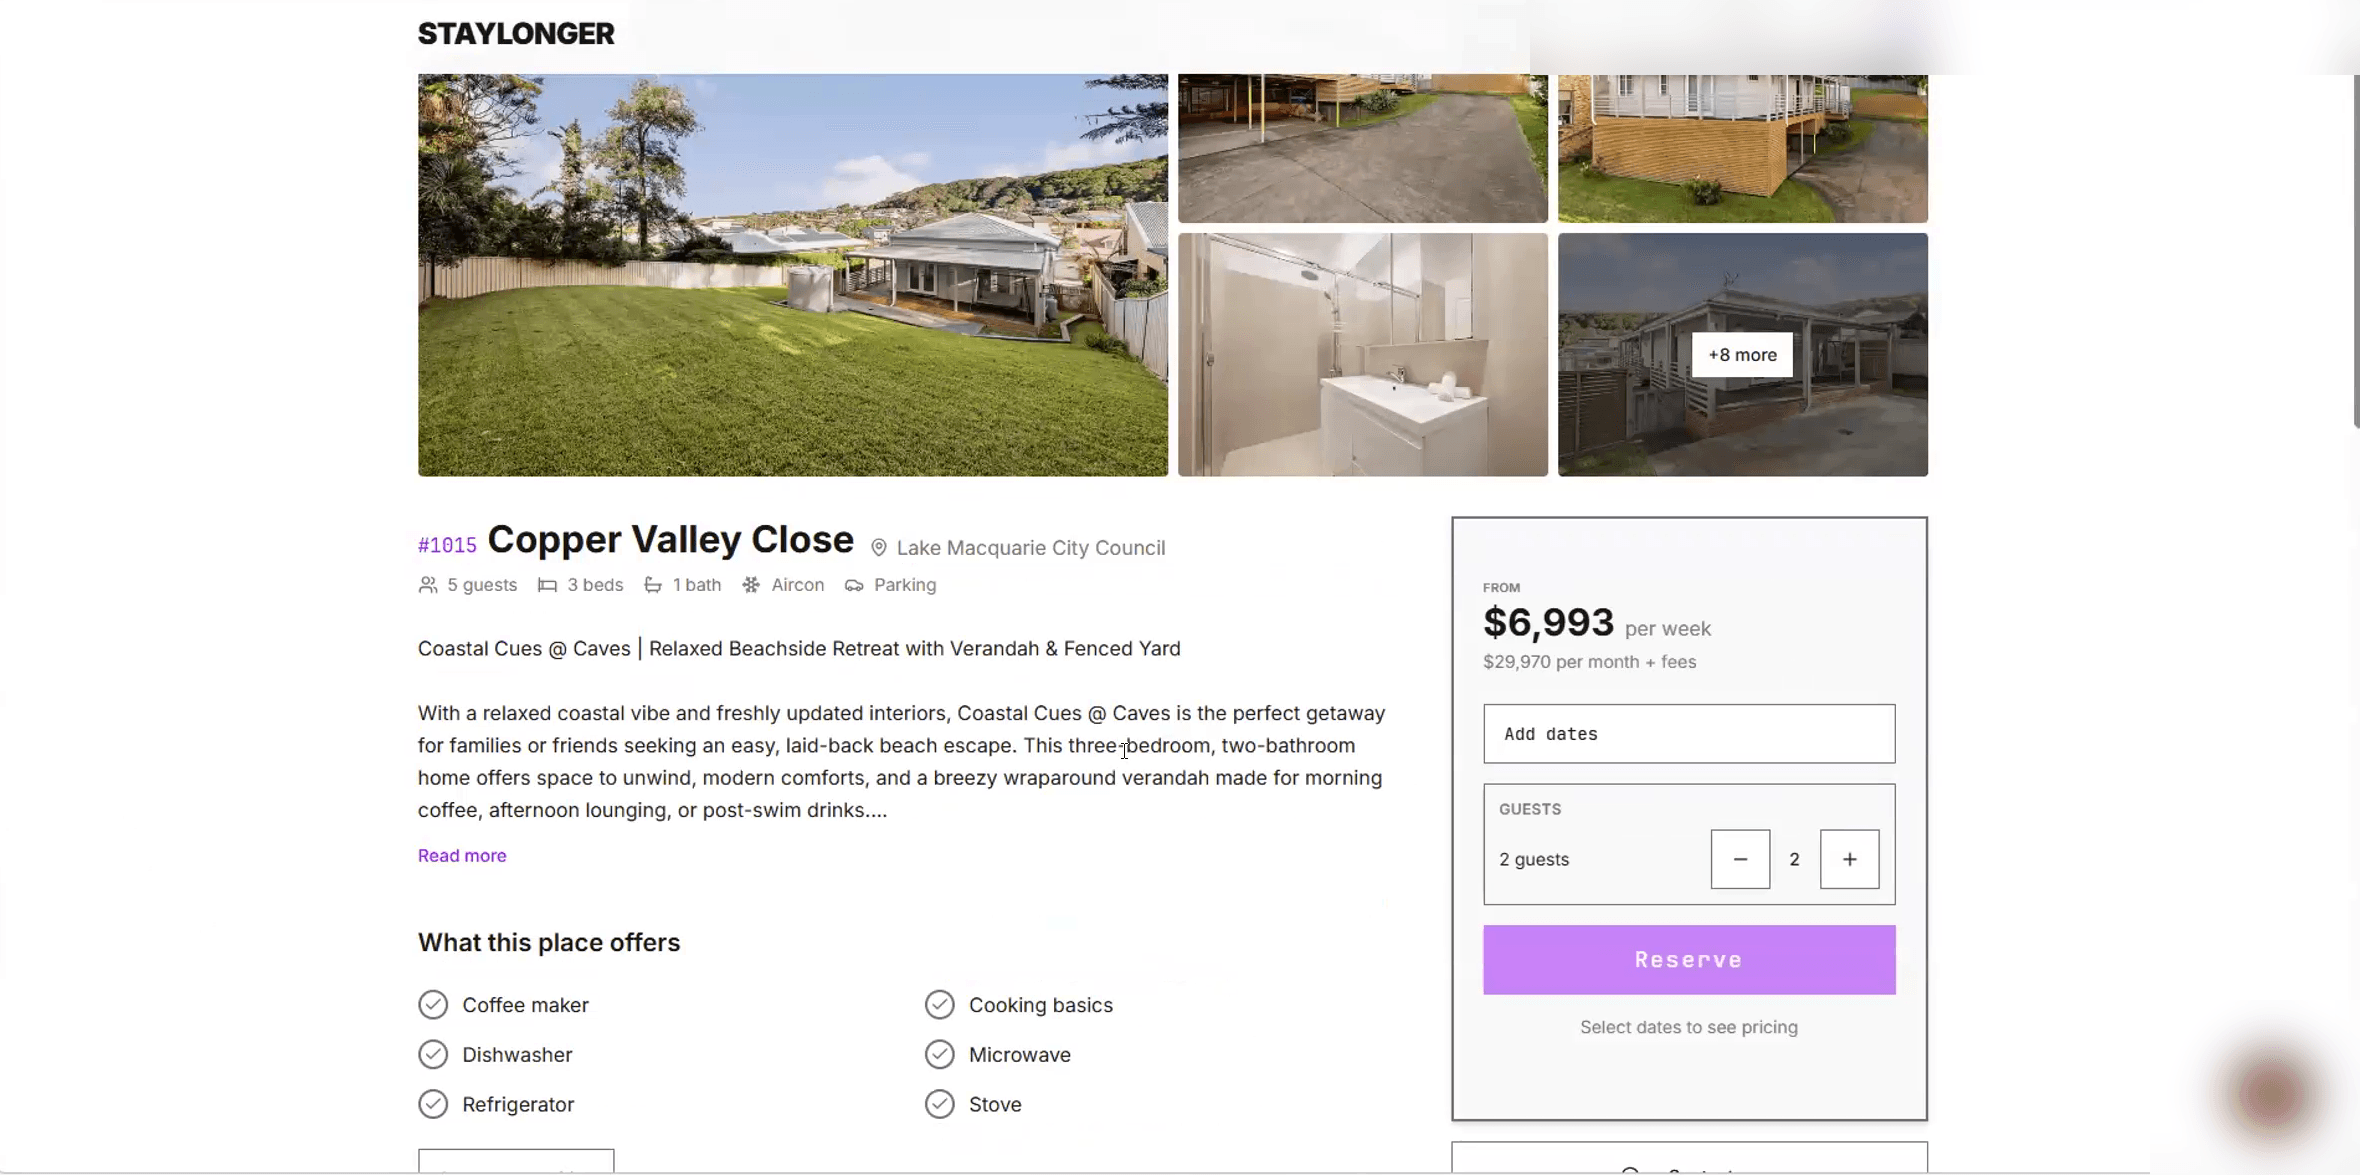
Your property page as guests will see it. - Imported properties start in Draft. When you're happy with how a listing presents, switch the toggle on the Properties page to Published to make it live.
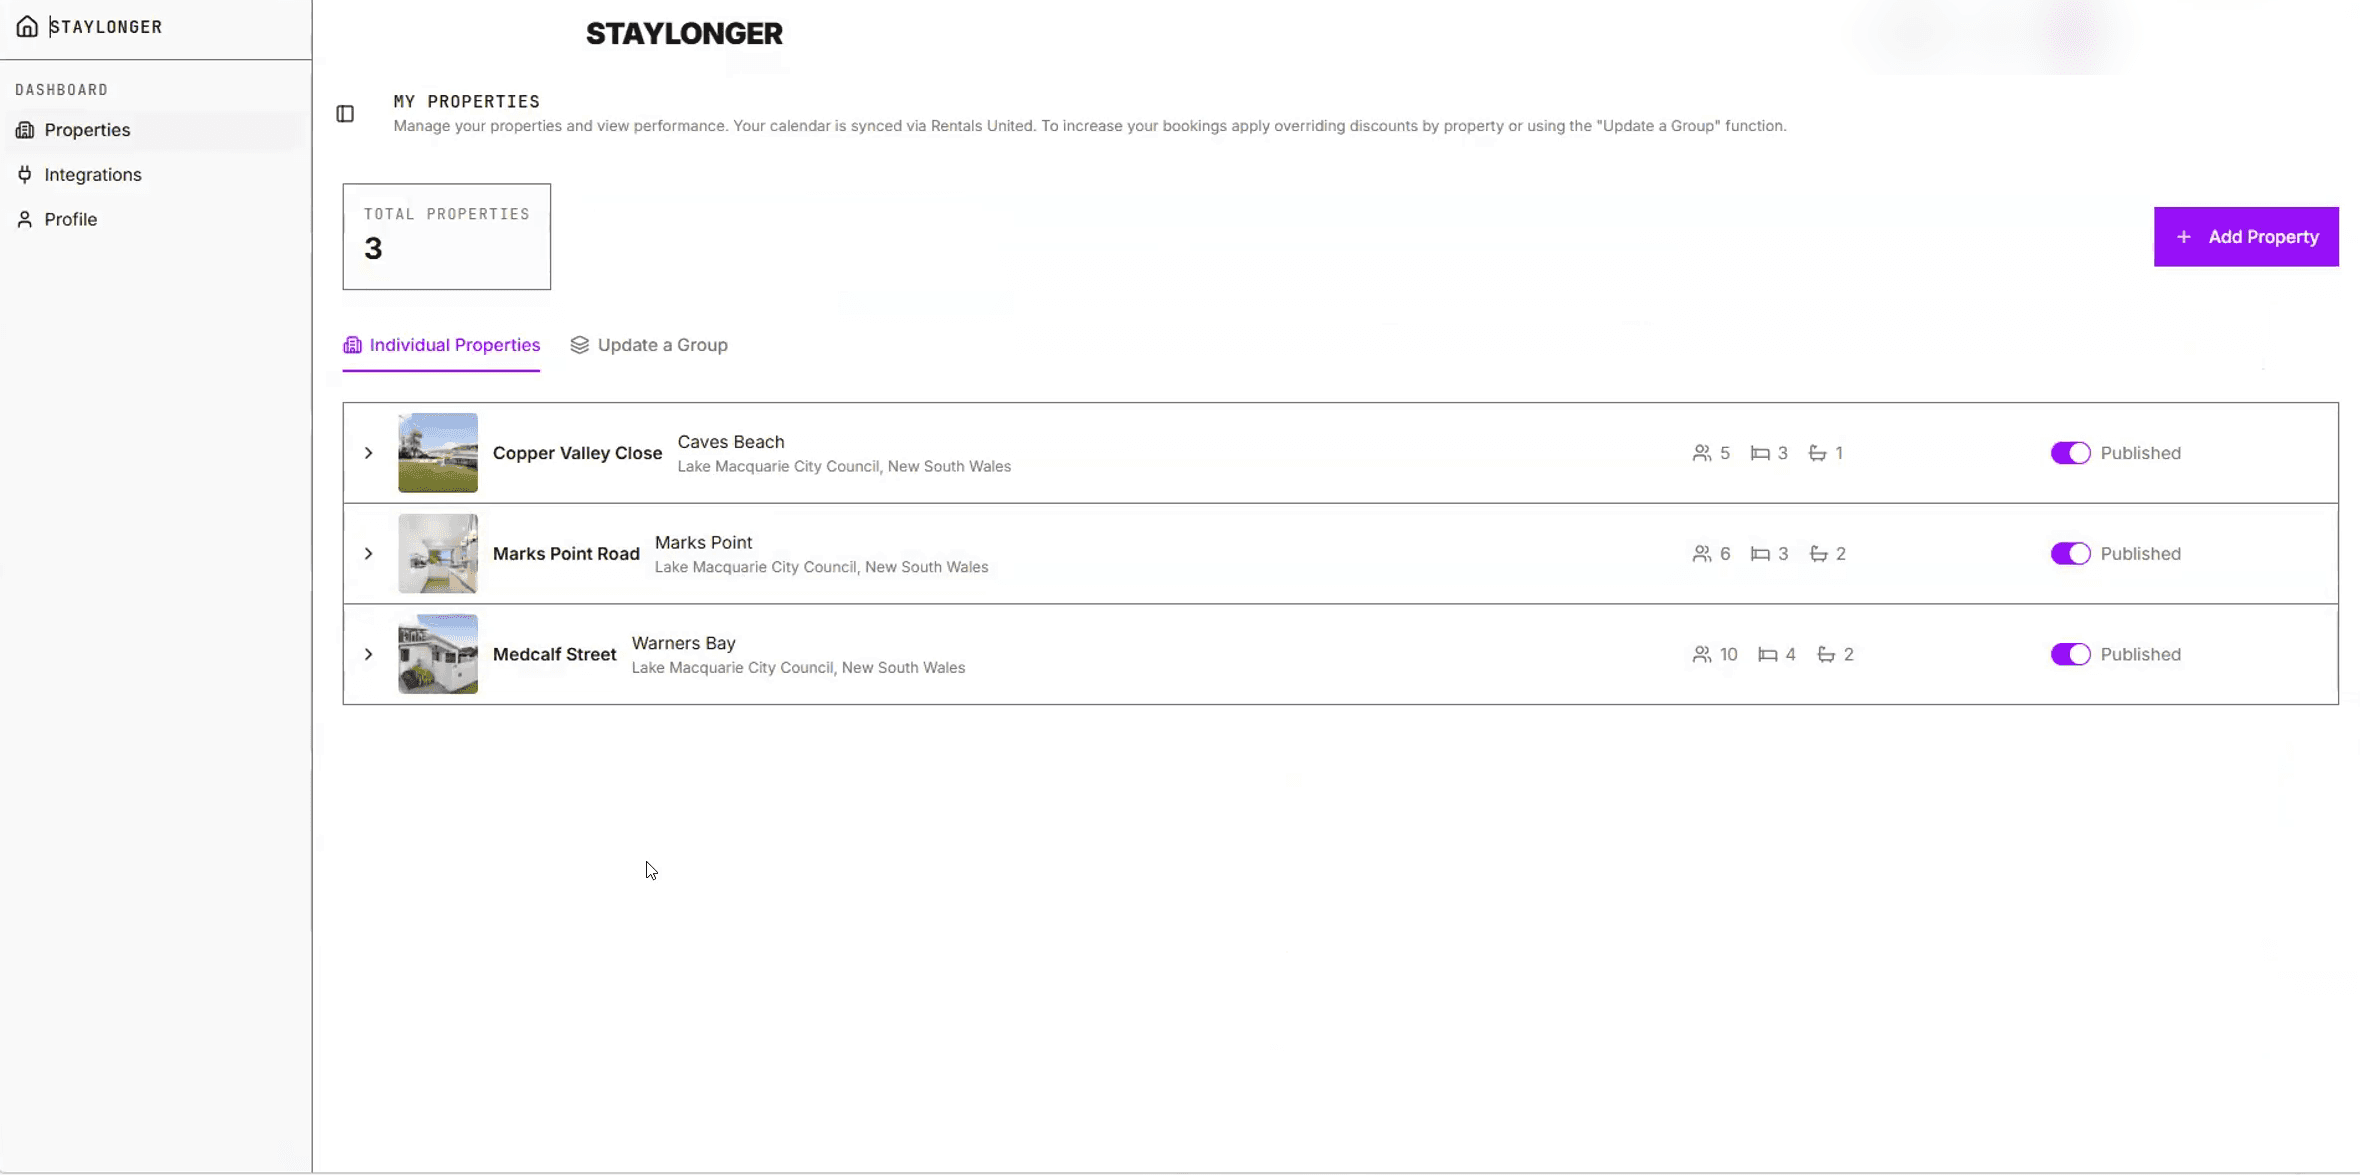
The publish toggle on the Properties page.
What happens next
- Your Staylonger contact will book a merchandising session with you to work through pricing, discount strategy and rate comparisons before your listings go live.
- A test booking is placed with you before launch to confirm everything flows end-to-end.
- Minimum stay on Staylonger is 30 nights. Your minimum/maximum stay settings in Resly flow through automatically.
- Booking notifications are sent to your Staylonger account email.
Need a hand?
If anything doesn't look right — a property missing from the import list, rates not appearing, or a connection error — reply to your onboarding email or contact the Staylonger team and we'll walk it through with you on a quick call.