Connecting Rentals United to Staylonger
Last Updated: July 17, 2026
Table of Contents
Staylonger is Australia's platform for furnished mid-term rentals, with a minimum stay of 30 nights. This guide walks you through connecting Rentals United to Staylonger, importing your properties, and setting long-stay discounts.
The whole process takes around 20 minutes. Rates, availability, descriptions and photos sync continuously from Rentals United once connected.
Before you start
You'll need:
- Your Rentals United login (if you access Rentals United through Guesty, the login details are under Distribution → Rentals United in Guesty).
- The email address/username registered on your Rentals United account.
- An email address for your Staylonger host account.
Part 1 — Add Staylonger as a channel in Rentals United
This step must be done first — Staylonger can't connect to your Rentals United account until the channel is activated on the Rentals United side.
- Log in to Rentals United and open Services. Find STAYLONGER in the list and click Get Connected.
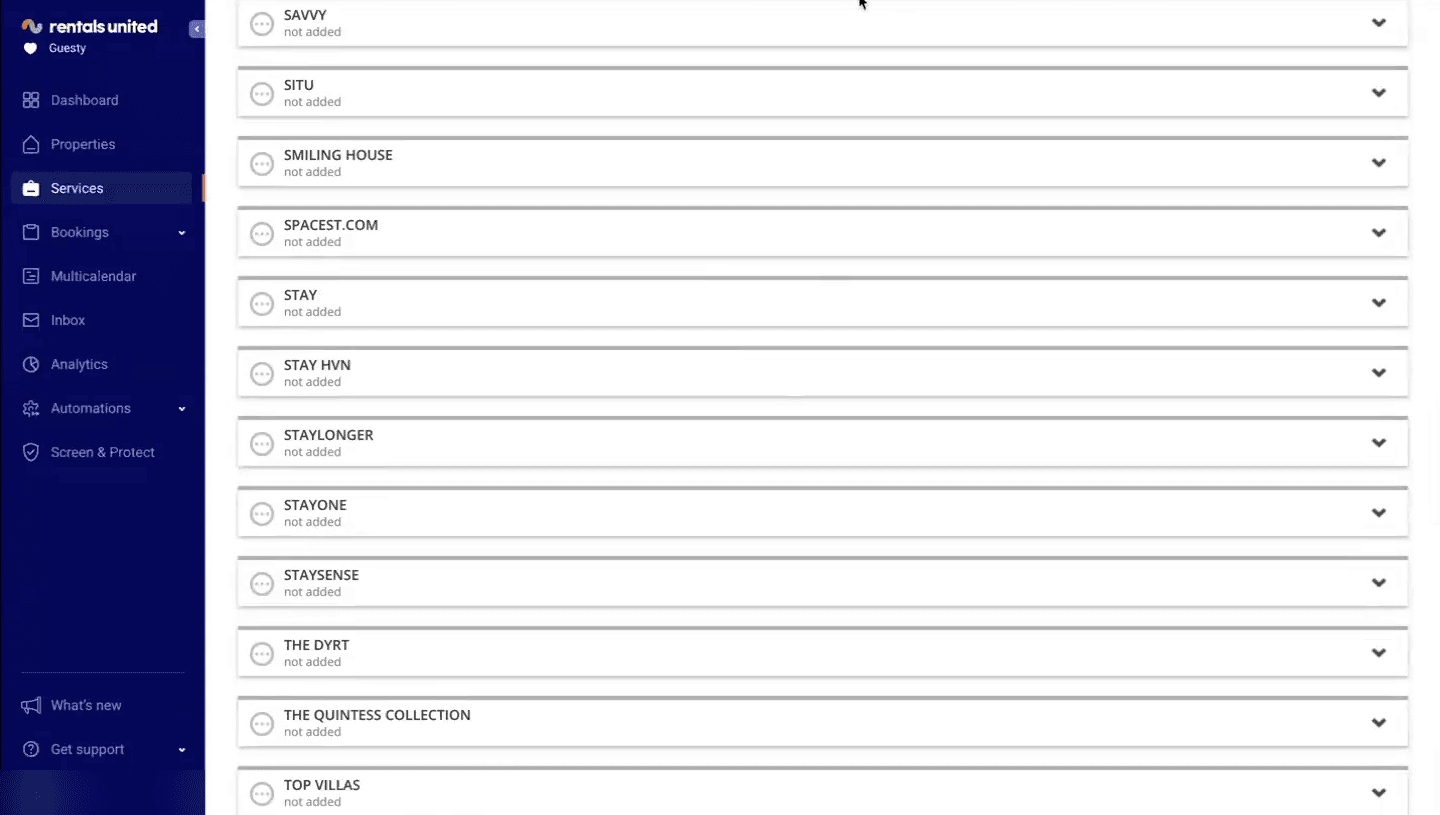
The Services list in Rentals United — find STAYLONGER. - Step 1 of 3 — How it works: review the connection rules (synchronisation, commissions, confirmations, cancellations and payments), tick the attestation and click Save & Next.
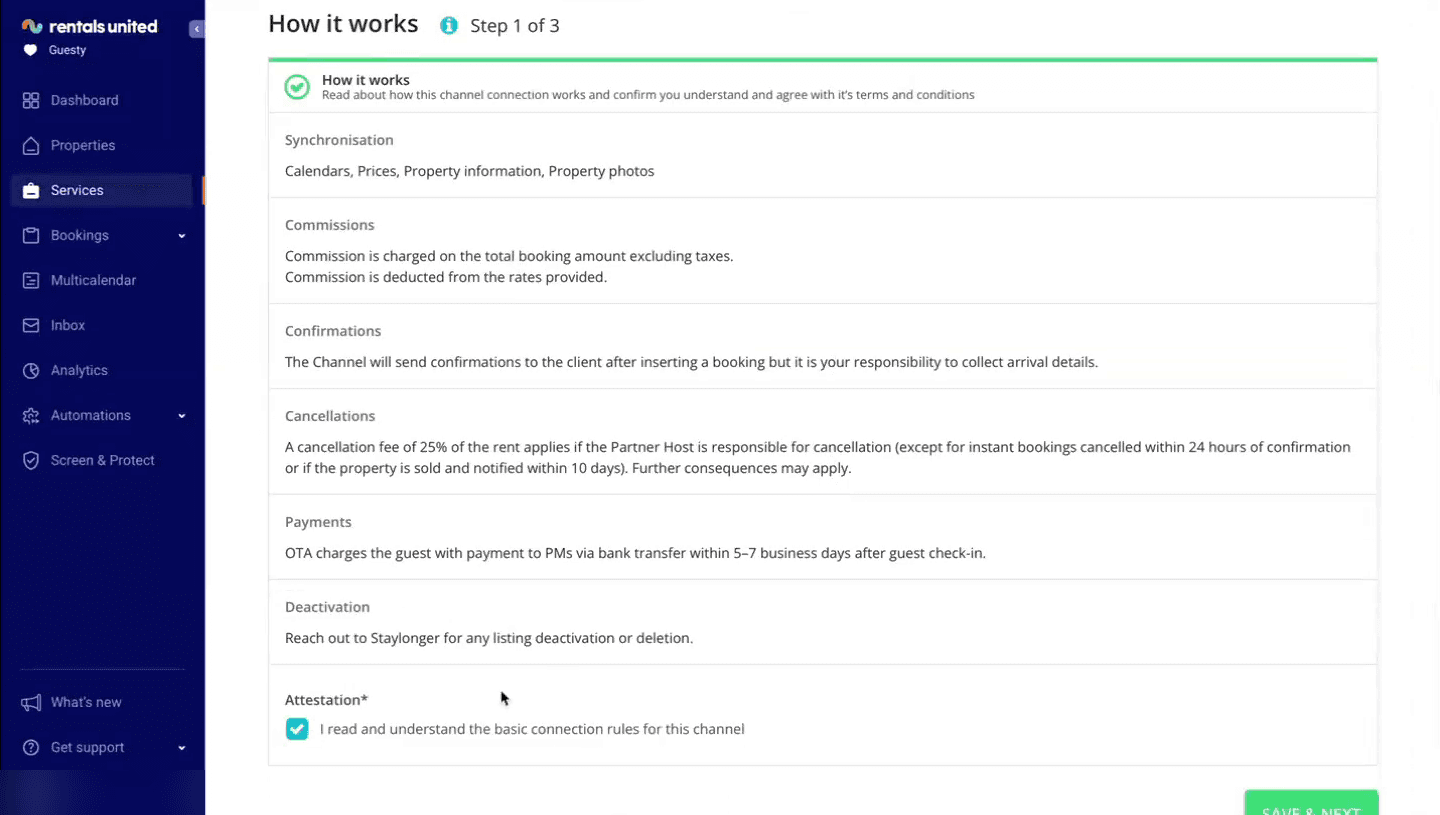
Step 1 — review and accept the channel connection rules. - Step 2 of 3 — Markup: optionally add a price or fee markup to the rates sent to Staylonger (for example, to cover the Staylonger host fee). Enter 0% if you don't want any markup — your Staylonger contact will cover fee strategy in your merchandising session.
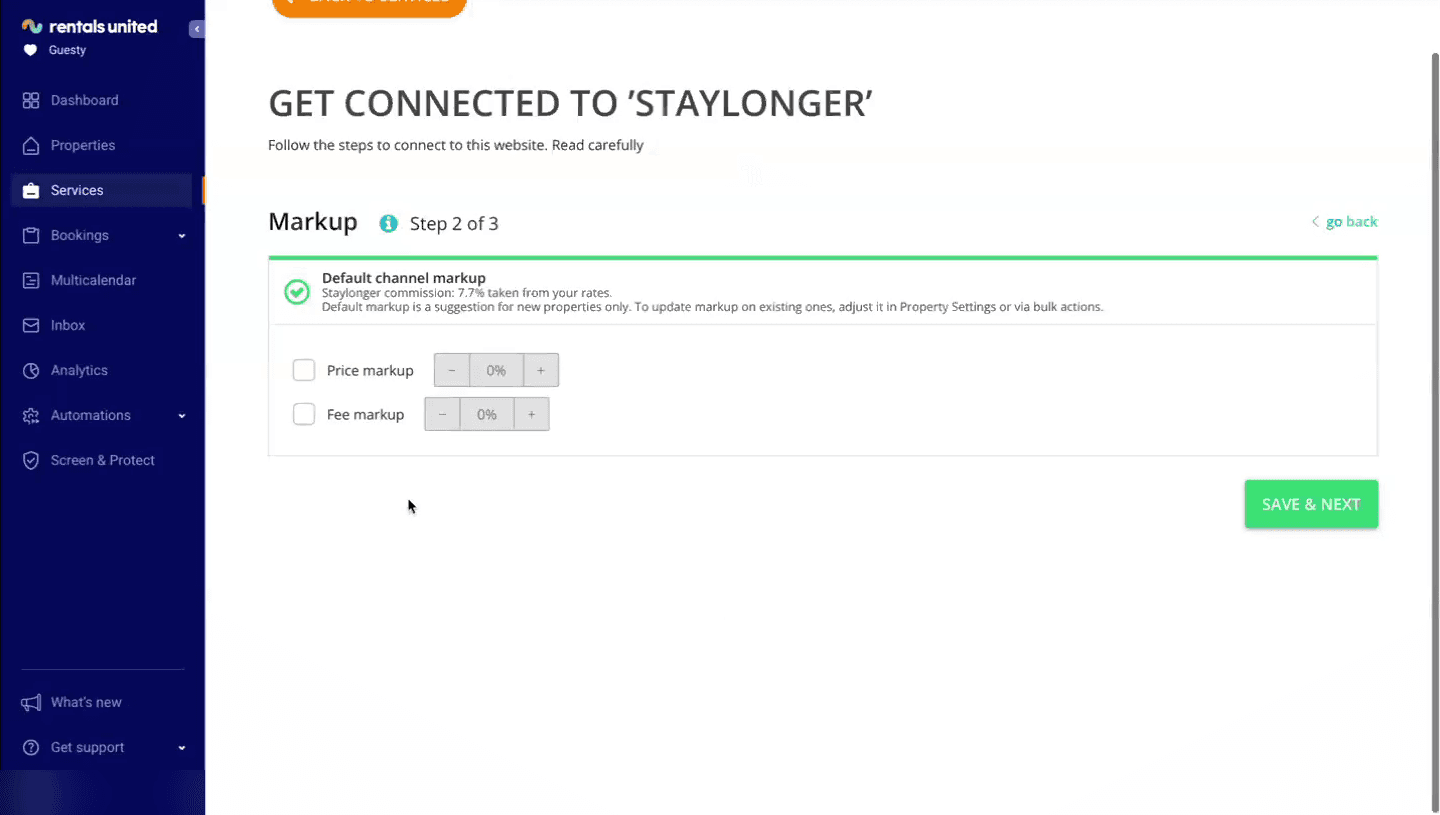
Step 2 — set an optional price/fee markup. - Step 3 of 3 — Further instructions: confirm whether you already have a Staylonger account, then continue.
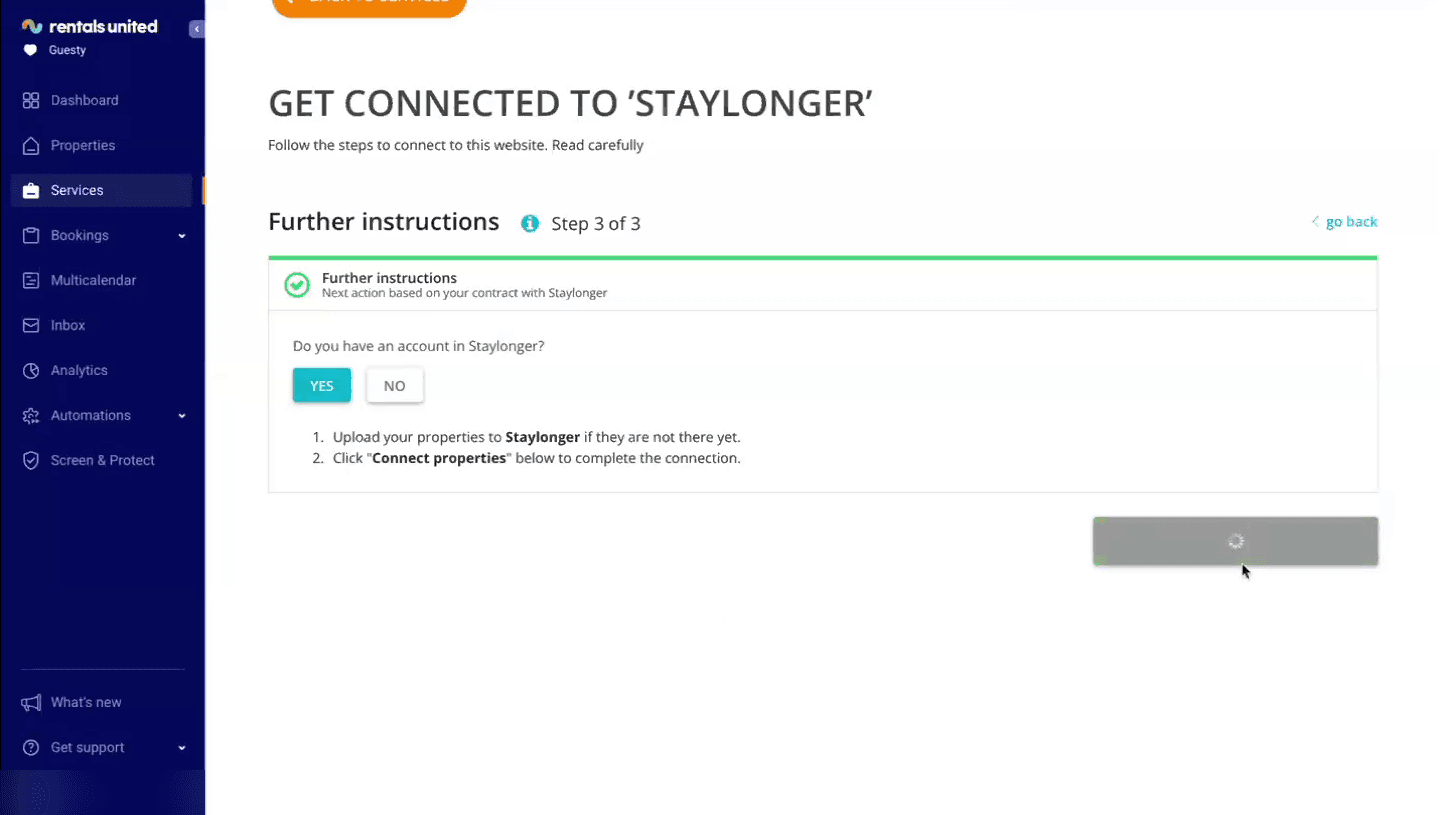
Step 3 — final instructions before publishing properties. - Select the properties to push to Staylonger, set the markup per property, and click Publish Properties.
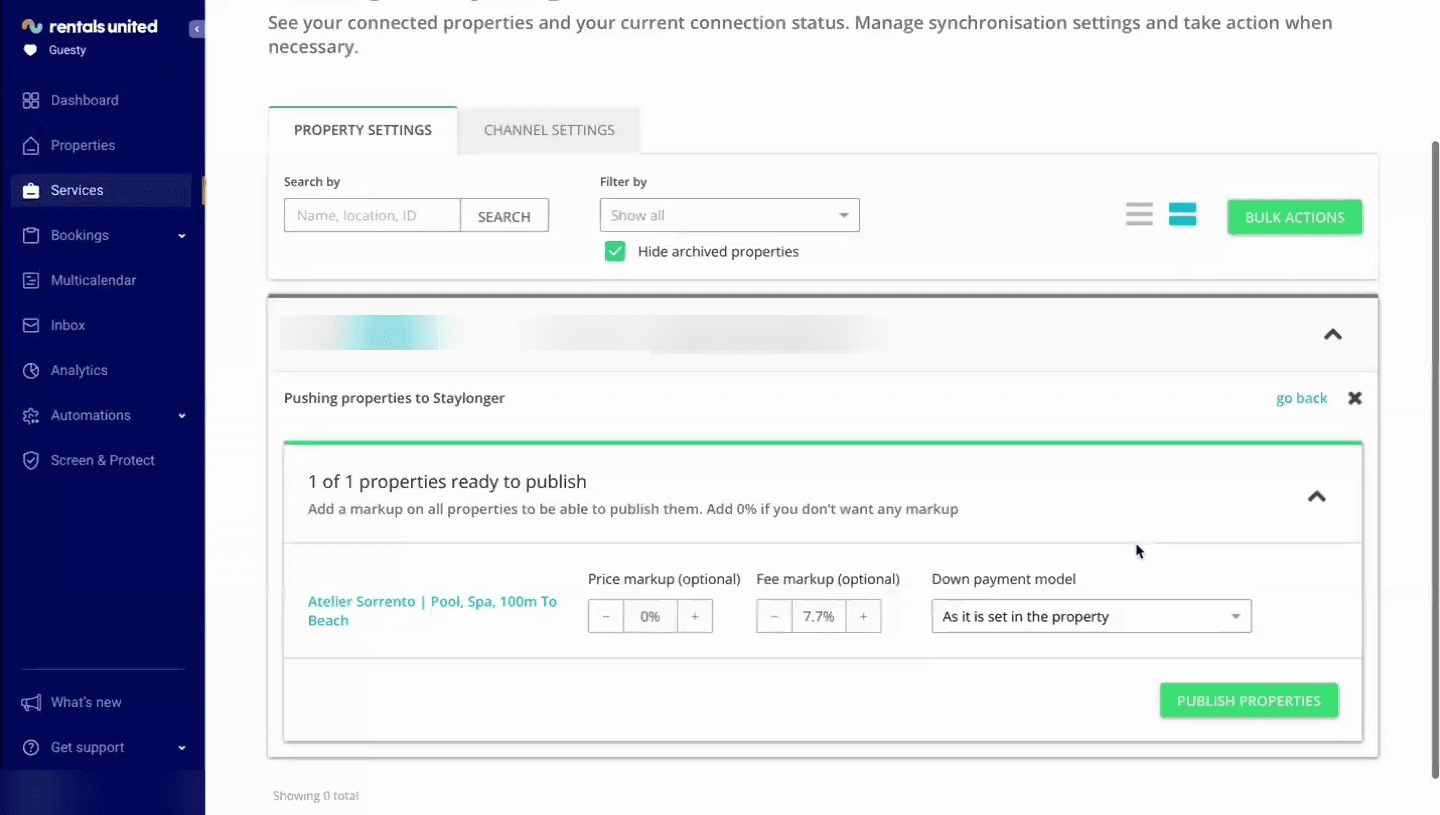
Choose properties, set markup and click Publish Properties. - You'll land on the Manage Staylonger connection screen, where each property's connection status is shown (pending until the import completes on the Staylonger side). Use Add Property here to push more properties later.
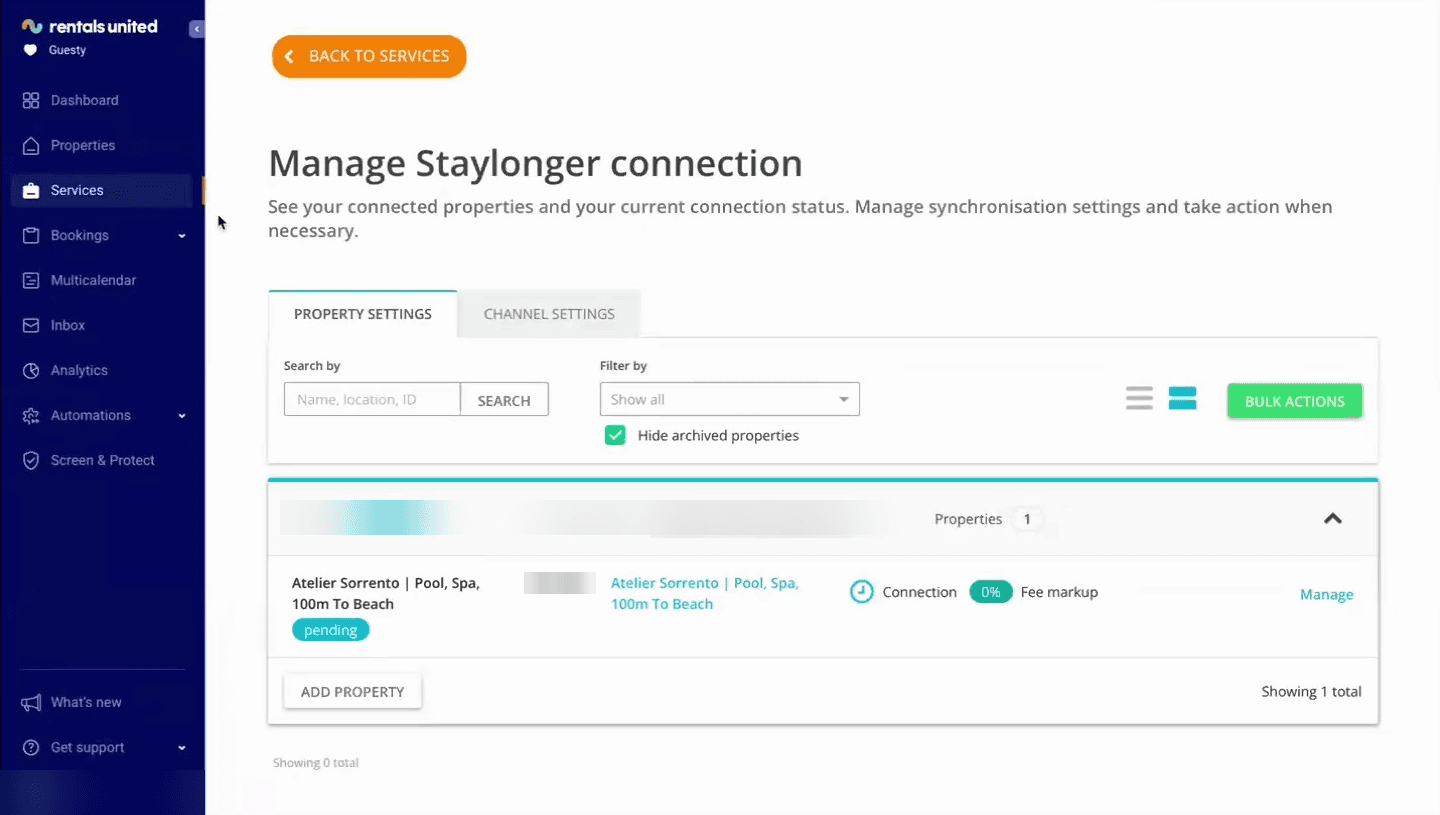
Manage Staylonger connection — connection status per property.
Part 2 — Create your Staylonger host account
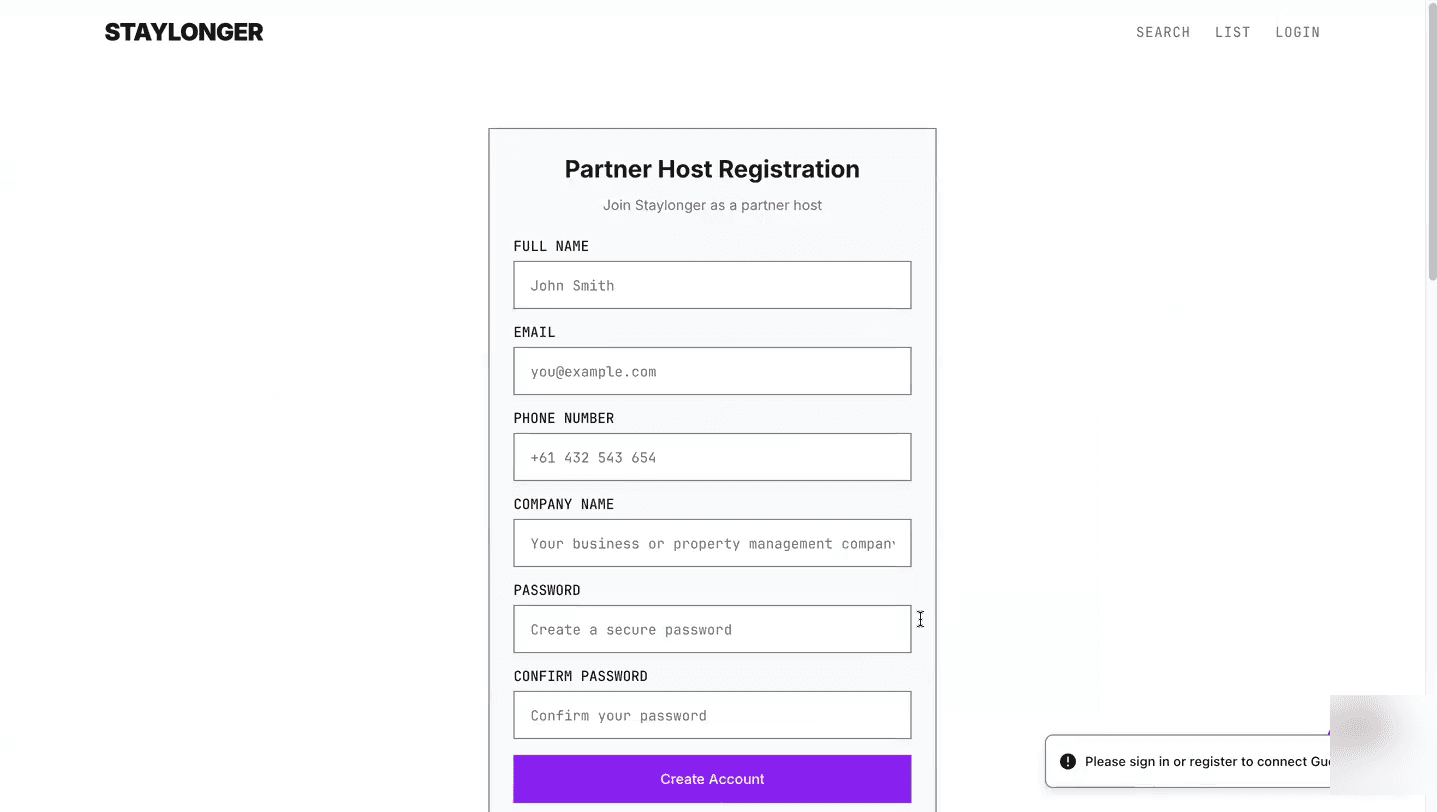
Go to staylonger.com.au, click Log in, then Sign up as a partner host. Booking notifications will be sent to the email address you register with.
Part 3 — Import your properties into Staylonger
- Once signed in, click Add Your First Property.
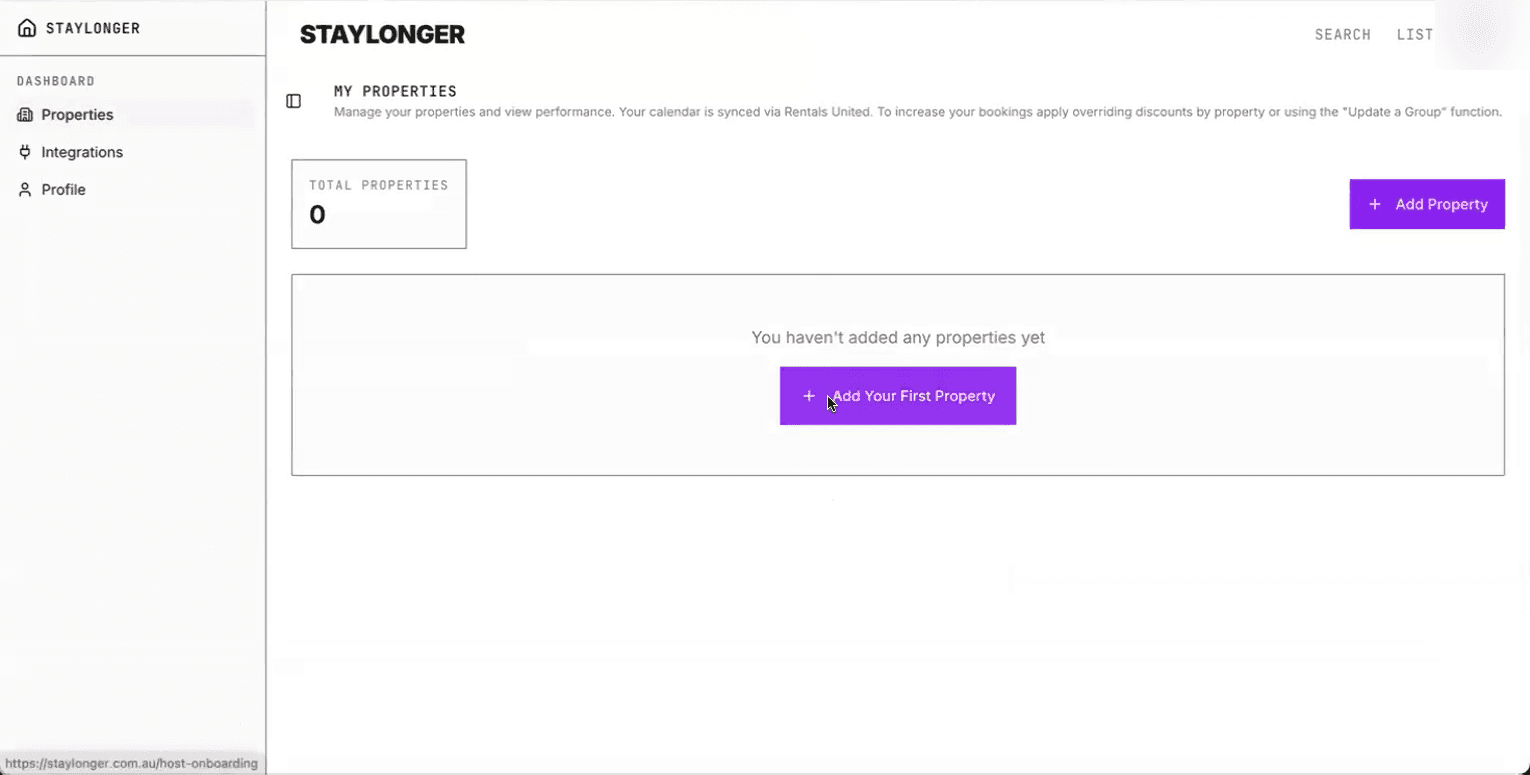
Add Your First Property from the Staylonger dashboard. - Choose Rentals United, then enter the username registered on your Rentals United account (usually an email address) and click Connect Account.
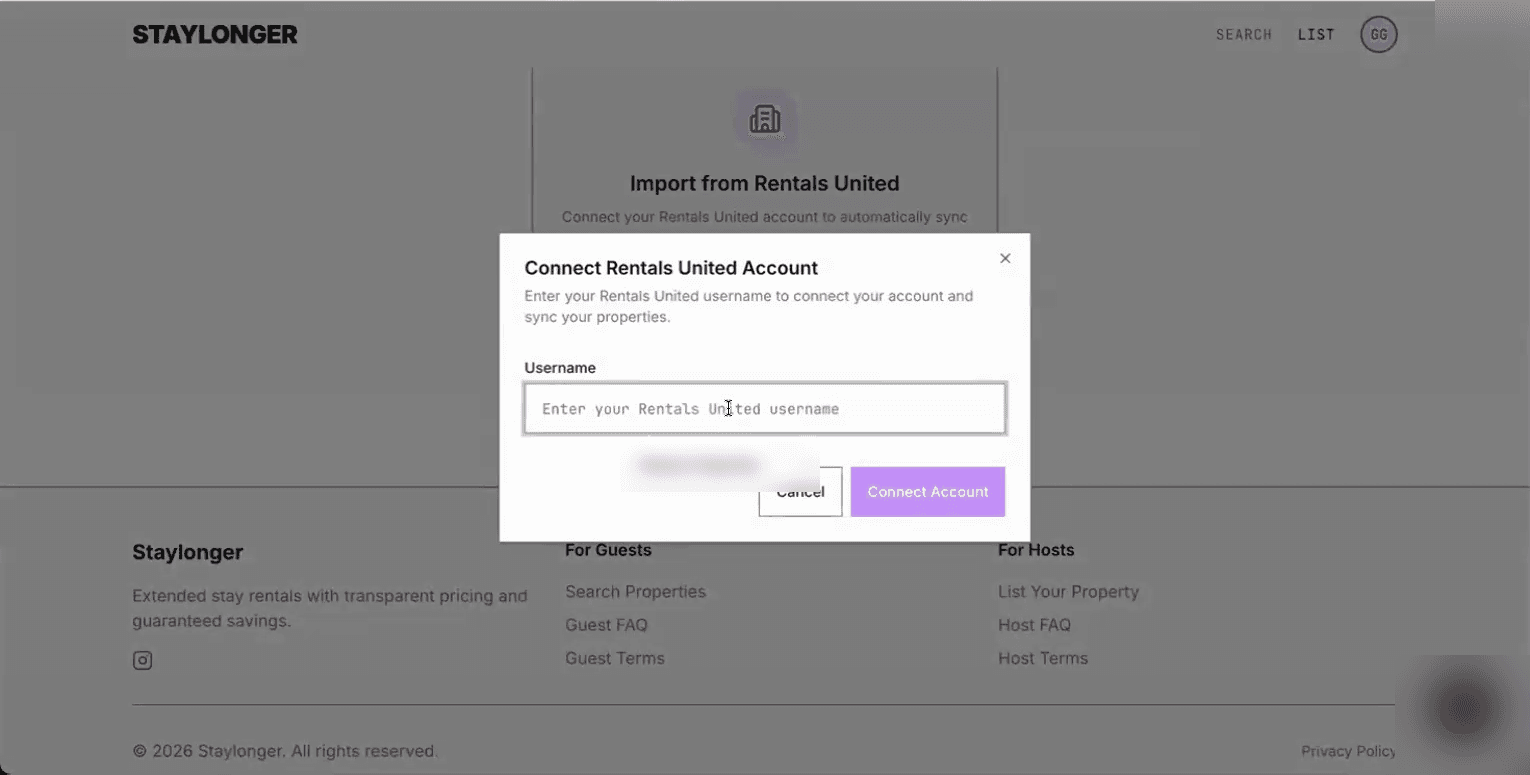
Connect Rentals United Account — enter your RU username. - Your published properties appear in the list. Click Import next to each one you want on Staylonger. The import takes a few minutes while photos and content are pulled through.
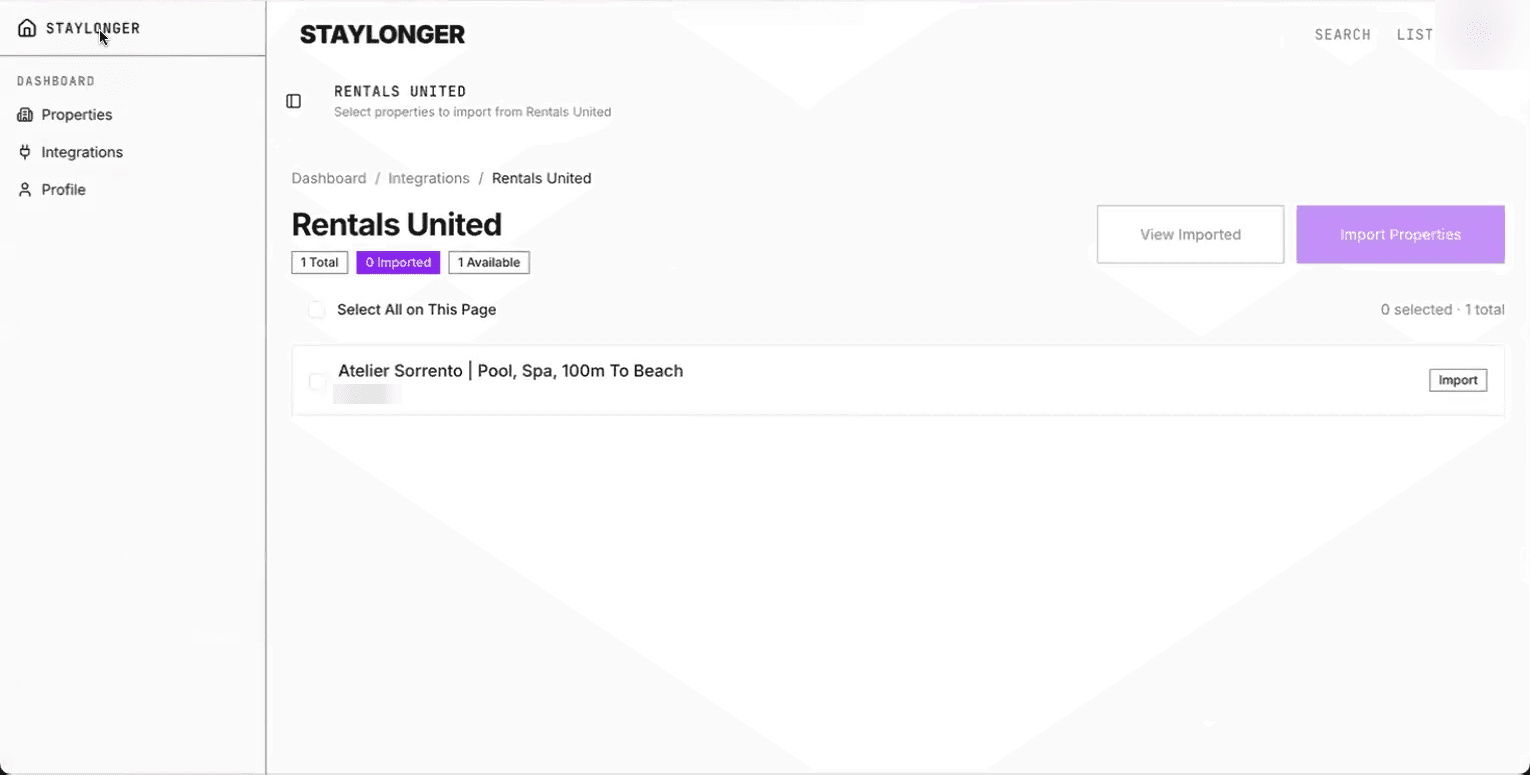
Click Import next to each property. 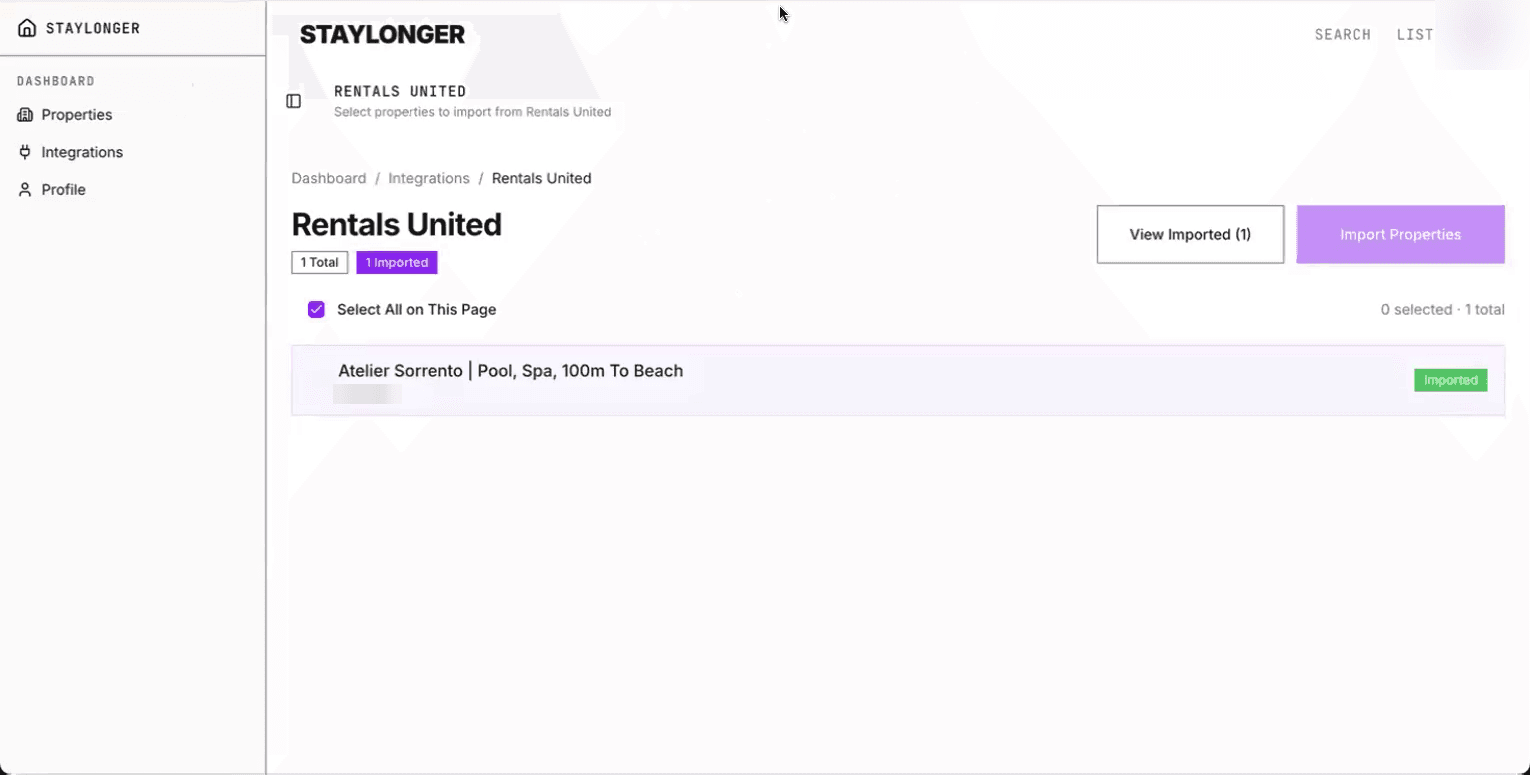
Property imported into Staylonger.
Note: If the connection fails, the most common cause is that Staylonger hasn't been added as a channel in Rentals United yet — complete Part 1 first.
Part 4 — Set your long-stay discounts
Staylonger pulls rates directly from Rentals United (including anything pushed from your pricing tool, e.g. PriceLabs). Discounts you set on Staylonger apply on top of those rates and only affect Staylonger — so you can run a dedicated multi-month campaign here without touching any other channel.
- Go to Properties, expand your property with the arrow on the left, and click View Calendar to confirm the calendar has synced.
- Nominate discount percentages for 30, 60, 90+ day stays and click Submit. If your long-stay discounts already flow through your pricing tool, you can leave these at zero.
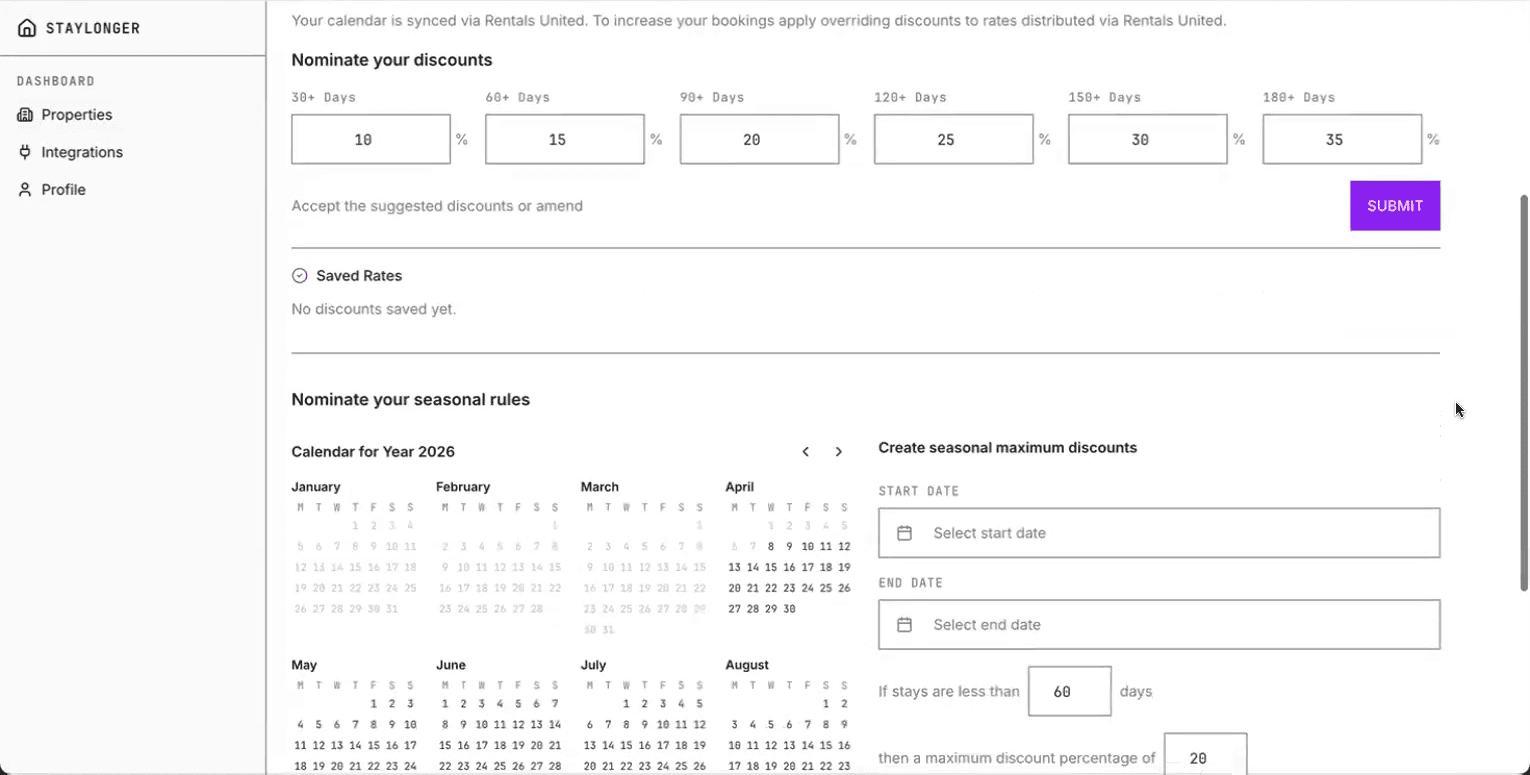
Nominate your discounts for longer stays. - Optionally add seasonal rules to cap discounts over peak periods — for example, a maximum discount of 5% over December–January.
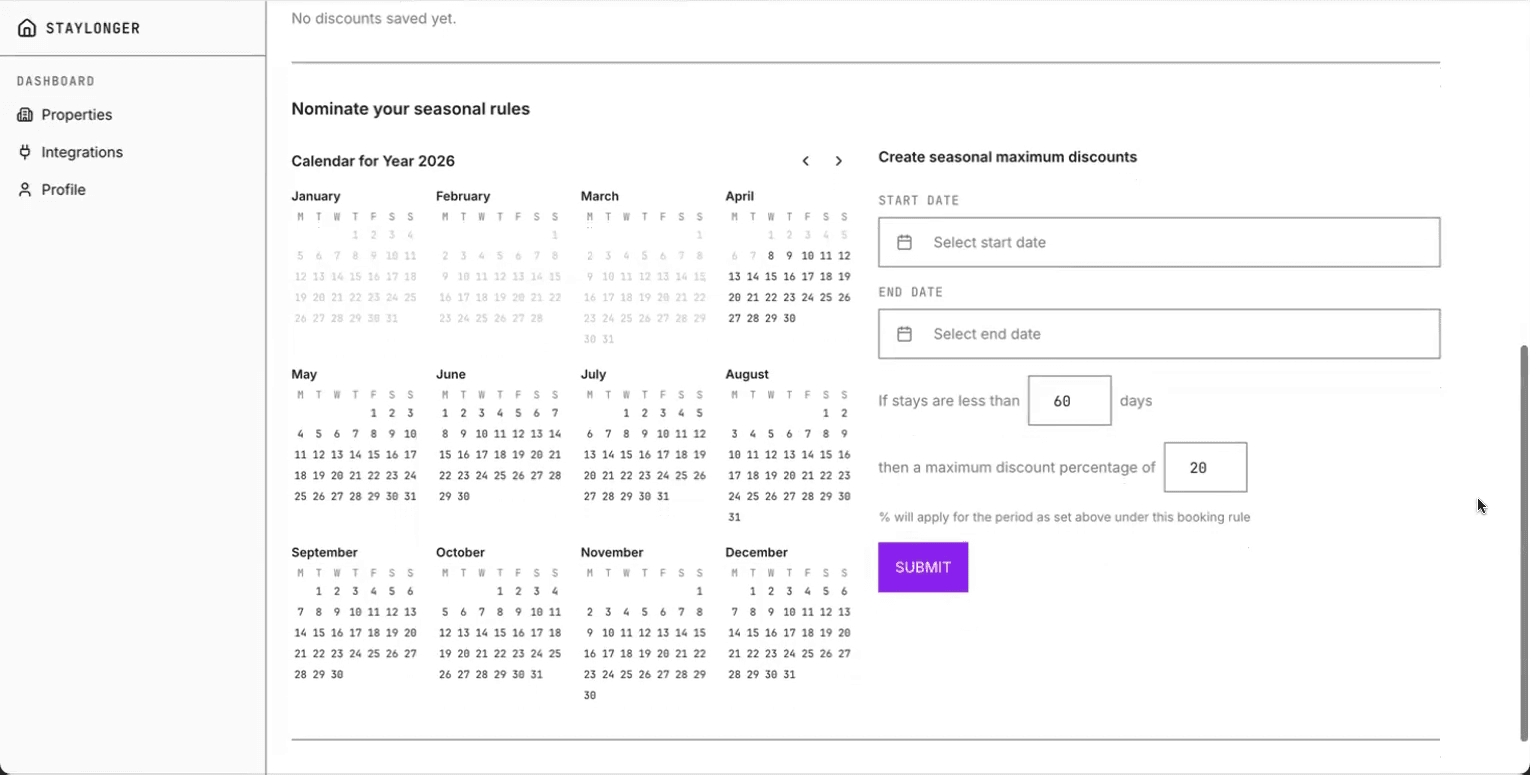
Seasonal rules — set a maximum discount for chosen dates.
Tip: To apply the same discounts across multiple properties at once, use the Update a Group tab on the Properties page.
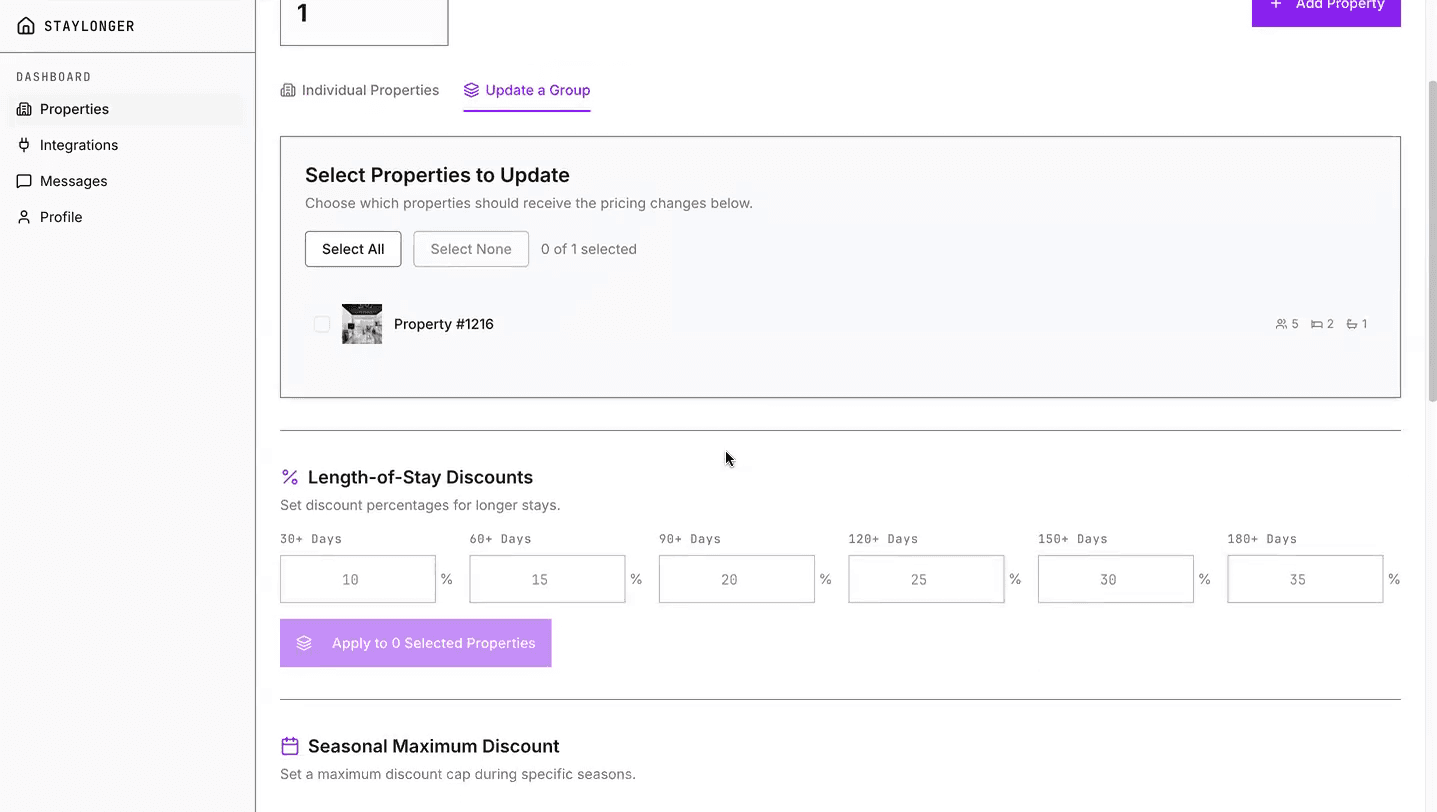
Part 5 — Preview and publish
- Click Preview your property at the bottom of the calendar page to see the listing as guests will — you can select dates and generate a quote to check your rates and discounts are coming through as expected (any stay must be 30+ nights).
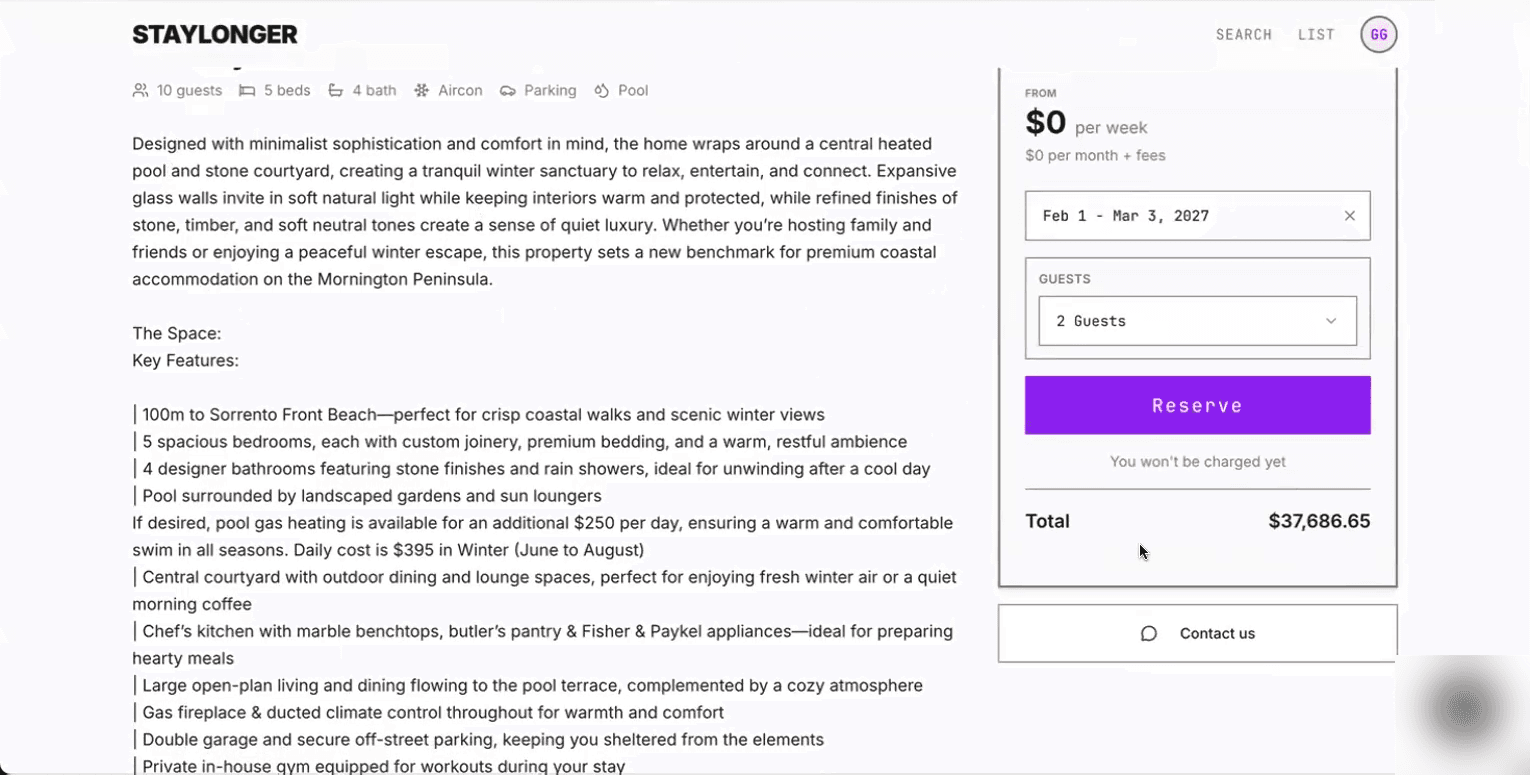
The live listing page with a quote for a 30+ night stay. - Imported properties start in Draft. When you're happy with how the listing presents, switch the toggle on the Properties page to Published to make it live.
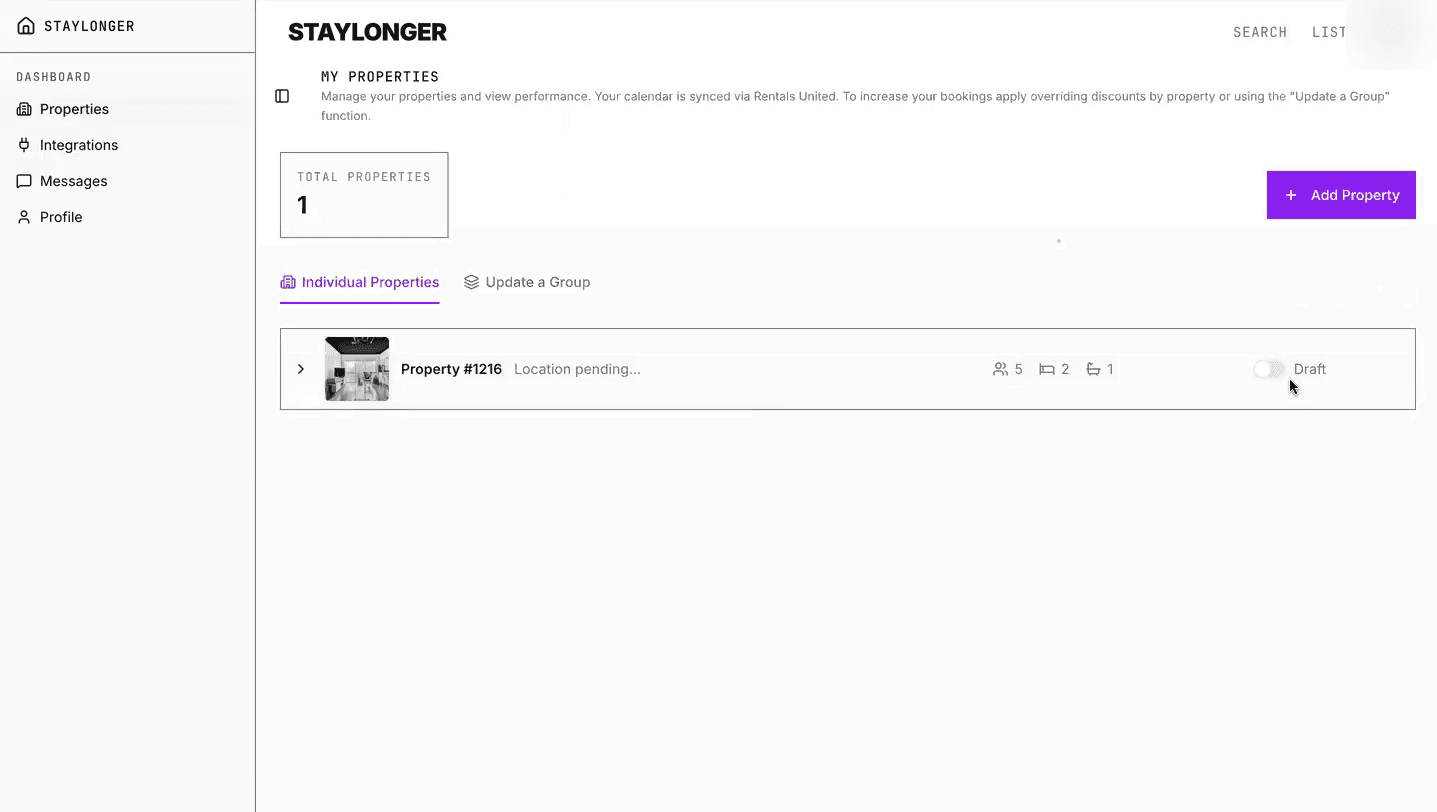
The Draft/Published toggle on the Properties page.
What happens next
- Your Staylonger contact will book a merchandising session to work through pricing, fees and discount strategy before your listings go live.
- A test booking is placed with you before launch to confirm everything flows end-to-end.
- Minimum stay on Staylonger is 30 nights. Guests on longer stays pay on a monthly schedule, with a pre-authorisation taken before check-in — your Staylonger contact can share the full payment schedule.
- To add more properties later: publish them to Staylonger in Rentals United (Manage Staylonger connection → Add Property), then import them from the Staylonger side.
- Booking notifications are sent to your Staylonger account email.
Need a hand?
If anything doesn't look right — a property missing from the import list, rates not appearing, or a connection error — reply to your onboarding email or contact the Staylonger team and we'll walk it through with you on a quick call.